
Our experiences with the extrusion of PET bottles into 3D printing filament: shredding and extrusion walkthrough.
In this study we prepare the PET bottles, shred them, and perform several adjustment steps to find the optimal extrusion settings. The quality of the filament is analyzed.
1. General: the recycling study
This document shows the recycling process of PET. It explains how PET bottles were shredded into fine regrind with the SHR3D IT Recycler and the subsequent extrusion in 3devo's filament maker. It covers important things to keep in mind when shredding and extruding PET.
Please note that this document is only an indication on PET extrusion, different grades of PET may require different settings.
Table 1: Material name and properties
| Material | PET (PolyEthylene Terephthalate) |
| Melting point | 225°C |
| Drying duration | 4h |
| Drying temperature | 140°C |
2. Before extrusion
2.1. Preparing the PET bottles before shredding
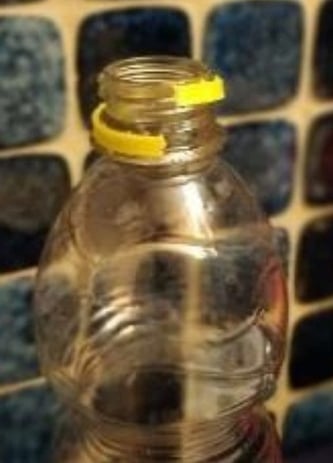
The PET bottles need to be shredded before they can be extruded. Starting off with cleaning the bottles, because it is important that the shredding is done with clean PET bottles without any present contaminants! The cleaning is done with hot water, scrubs and brake cleaning fluid to get rid of all the labels and the glue. When the bottles are fully cleaned, there are two final things to remove from the bottle: the cap and the safety seal. The safety seal is removed by cutting it and pulling it off the bottle (shown in Figure 1). After the bottle cleaning is done, they are left to dry (shown in Figure 2).
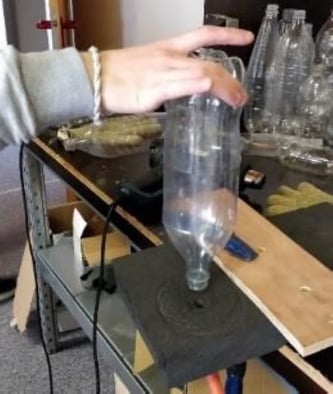
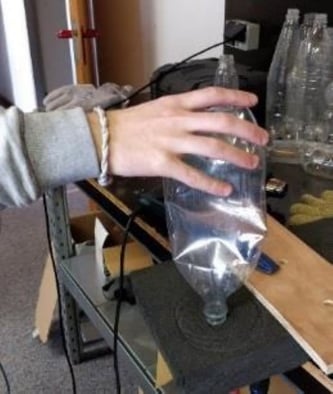
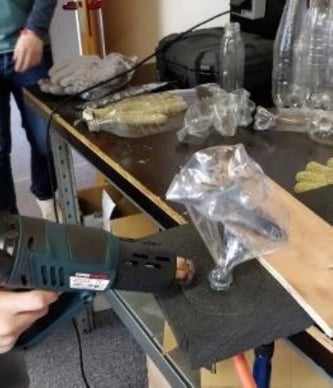
 The bottles in their original shape are too big to be shredded in the ‘SHR3D IT’. In Figure 3, 4 and 5 is shown how a vacuum pump is used to shrink the bottles. The bottles are put on punctured foam block. The opening is connected to the pipe of the vacuum pump. When the bottle is shrunk to its smallest size, it is slightly heated to let it keep its form. The heating is only done for a few seconds on 200°C. Sometimes after this is done, the bottles can be a little bit too wide. It’s easy to fold the bottles once more by putting a lot of pressure on it to let the bottle keep its folded form.
After compressing, a couple of bottles are cut using a saw and some scissors. Both ways were good for cutting the bottles into smaller pieces.

Both whole and cut bottles were tested. This led to a conclusion that shredding whole bottles works better. When the shredder grabs on to an object it easily pulls the whole object in the machine. When shredding cut pieces, the machine must grab on to more objects for the same volume of material.
2.2. Shredding PET bottles into regrind
This is an "old" report which we wrote using the Shr3d It. We have now upgraded to our new GP20 Hybrid but still need to update this report.
Below is the process of shredding the PET bottles in the ‘SHR3D IT’:
- First, the SHR3D IT must be cleaned. It is important that there is no old material left in the SHR3D IT. If the machine isn’t cleaned properly, the regrind will be contaminated with other materials. This will give bad results while extruding the shredded PET.
- At this point, the bottles can be placed in the shredder. It is important that the opening of the bottle must be facing down while shredding. The opening of the bottle will give the shredder a good surface and edges to grab on to.
- Sometimes the shaft won’t grab on to the bottle. When this problem occurs, a solution is to push the bottle on the shaft with a stick. When the shaft experiences pressure from the bottle it will grab on to the bottle. Make sure to never use your hands to put pressure on the bottle and never put your hands in the hopper! Always use an object for pushing down the bottles. Never let the stick get close to the shaft, this can be very dangerous!
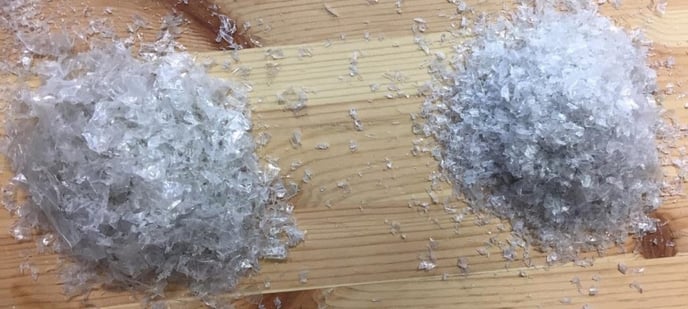
- When the drawer is full, it is recommended to shred the whole drawer content. This will ensure a well shredded regrind (shown in Figure 7).
3. Extrusion experiment
PET is a very hydroscopic material. Therefore, the PET was dried for 4 hours at a temperature of 160 °C. Meanwhile, looking at some past test with shredded PET, some previously used settings were found. The temperature of these settings was raised with +- 10 °C and used as a benchmark for carrying out the first set of tests.
3.1. Starting up: Cleaning the extruder
PET and PETG (and most other highly polar polymers) cannot stay inside the machine because both polymers are hygroscopic by nature, which means that they will absorb moisture (water) out of the atmosphere which will decrease filament quality in subsequent extrusion due to hydrolysis. Hydrolysis is a form of polymer degradation; small amounts of moisture will hydrolyze PET in the melting phase which will lead to a decrease in molecular weight. A decrease in molecular weight means a reduction in mechanical properties (i.e. more brittle materials). When hydrolysis happens, covalent bonds in the polymer chains will break.
Another reason why PET and PETG cannot stay inside the machine is due to their molecular structure containing oxygen atoms. Though their molecular structures are different, they both contain oxygen which can essentially "attack" the molecules when left at high temperature for too long.
Before extrusion, the machine was cleaned using DevoClean MidTemp, which you can buy here:
Once the Filament Maker was completely clean, it was heated up to the desired temperatures and the PET was inserted into the hopper up to the point that all the cleaning material had exited the barrel.
After extrusion, the method above was used backward. DevoClean MidTemp was ran until all the PET was out of the machine and only DevoClean was coming out of the nozzle. DevoClean MidTemp can stay in the extruder after extrusion has finished.
3.2. Extrusion results
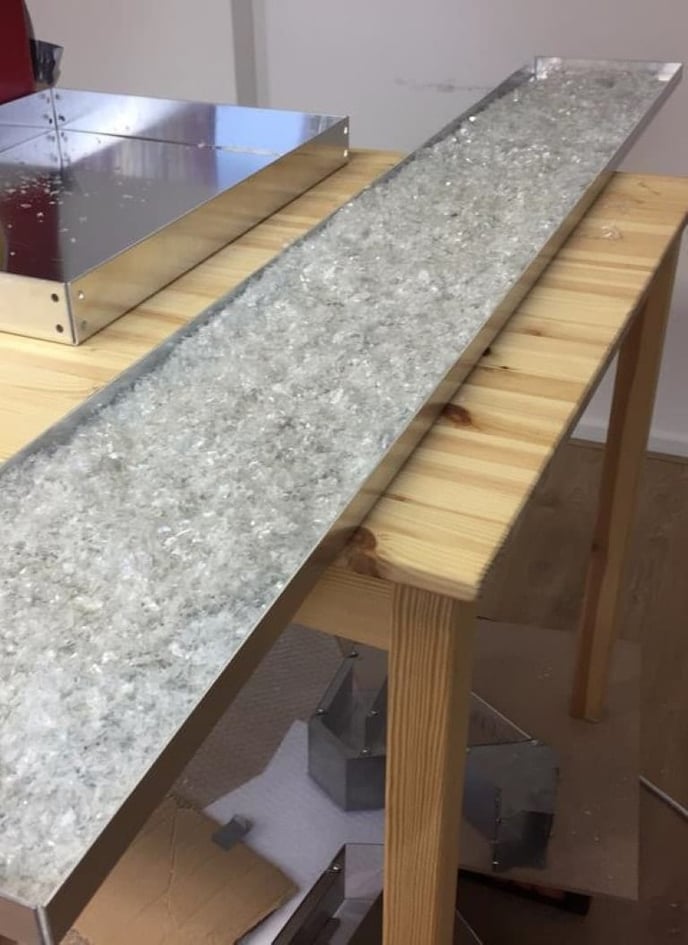
After the material is shredded and dried (shown in Figure 8), its ready to be extruded. The filament maker was used for the extrusion of shredded PET. Following are the test results. Here we show the settings used for every test, an observation of some samples of the filament and the conclusion of the test including advice for the settings for the next test.
3.2.1. Result #1
After drying the PET was prepared for extrusion. The settings used for this extrusion are visible in Table 2. These settings were based on past test done with PET and the thermal properties from Table 1.
Table 2: Initial extrusion settings
| Test 1 (2.85mm) | Heater 4 | Heater 3 | Heater 2 | Heater 1 |
| Heater setpoint | 260°C | 260°C | 260°C | 260°C |
| Screw speed | 5RPM | |||
| Filament fan speed | 50% |
Observations
Shown in Figure 9 is a photo of the extrusion of PET. The extruded PET was swirling a lot. This is caused by the high temperatures used for this extrusion. Hot material is liquid and will drop past the already solid material at the fans. This will cause the material to swirl. Most of the time, the material twitched when it reached the pullers. This made the filament jam in at the puller. The small amount of filament that was received is visible in Figure 9. In Figure 10 is also visible that the filament contains some bubbles. This problem is also due to the high temperatures.
Conclusion
The material was swirling, which is never good for a filament extrusion. The swirling and the bubbles in the filament are due to the material being too warm. Therefore, we will decrease the temperatures of heater two and one for the next test.
3.2.2. Result #2
To stop the filament from swirling, the temperatures of heater one and two were decreased. The settings used for this test are shown in Table 3.
Table 3: Modified extrusion settings (note: fancooling is influenced by room temperature)
| Test 2 (2.85mm) | Heater 4 | Heater 3 | Heater 2 | Heater 1 |
| Heater setpoint | 260°C | 260°C | 240°C | 240°C |
| Screw speed | 5RPM | |||
| Filament fan speed | 80% |
Observations
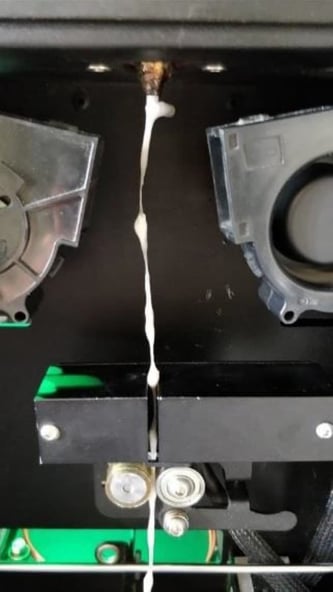
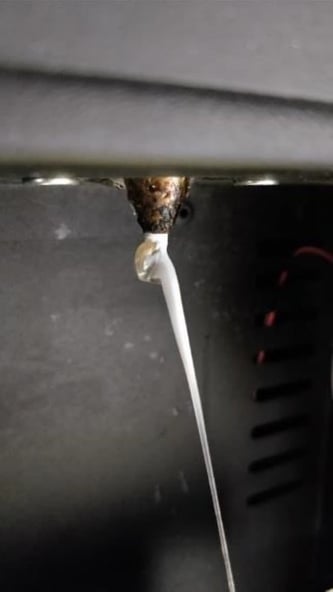
The extrusion with these settings was not great. The material came out too cold. This made the filament solidify around the nozzle, making it clog in the nozzle (shown in Figure 11 and 12).
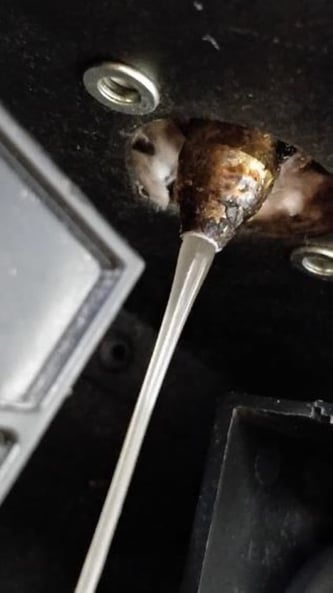
After turning up the heaters a bit, the filament came out of the nozzle with a new problem. The material solidified at the edges of the nozzle, but it stayed liquid in the middle. The solid parts in the nozzle started to work as an insulator. This kept the material in the middle warm enough to keep its liquid state. The solid material at the edges of the nozzle decreased the diameter of the nozzle, giving bad test results. This problem is clearly visible in Figure 13.
We also found the filament still contained some bubbles now end then. This meant the material still got too hot in the barrel.
Conclusion
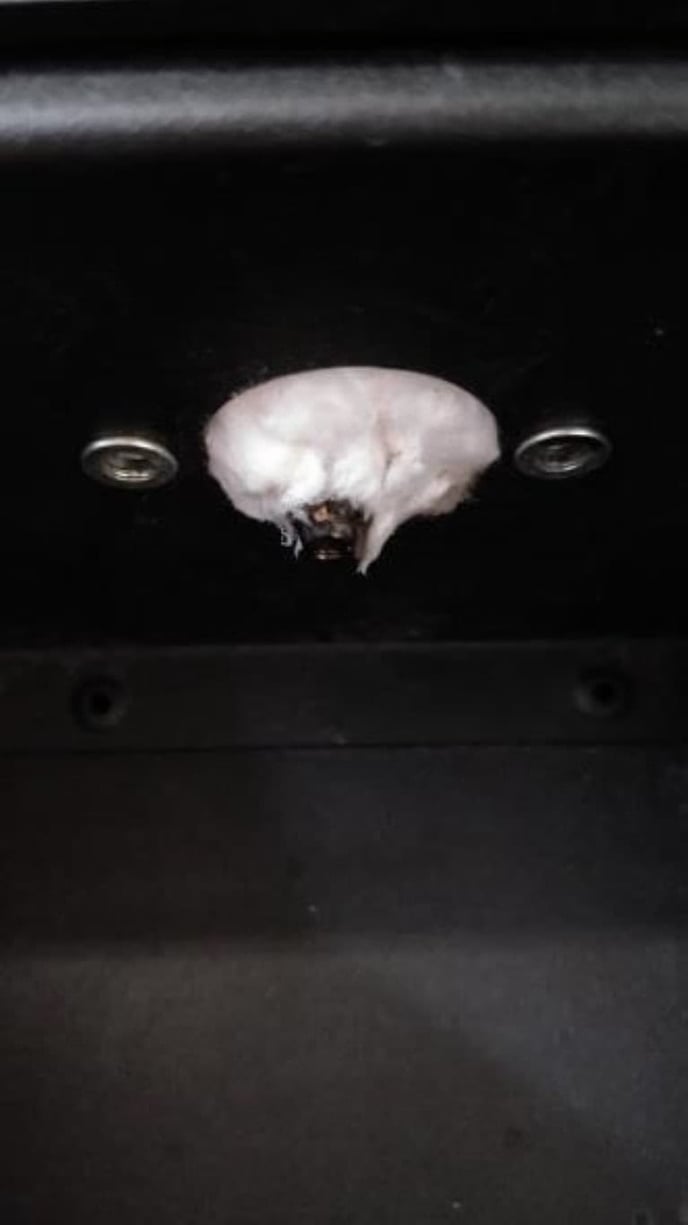
The biggest problem we found during this test, was the nozzle being too cold for good extrusion. The cold nozzle made the filament solidify, turning the material into a sort of insulator, or it would
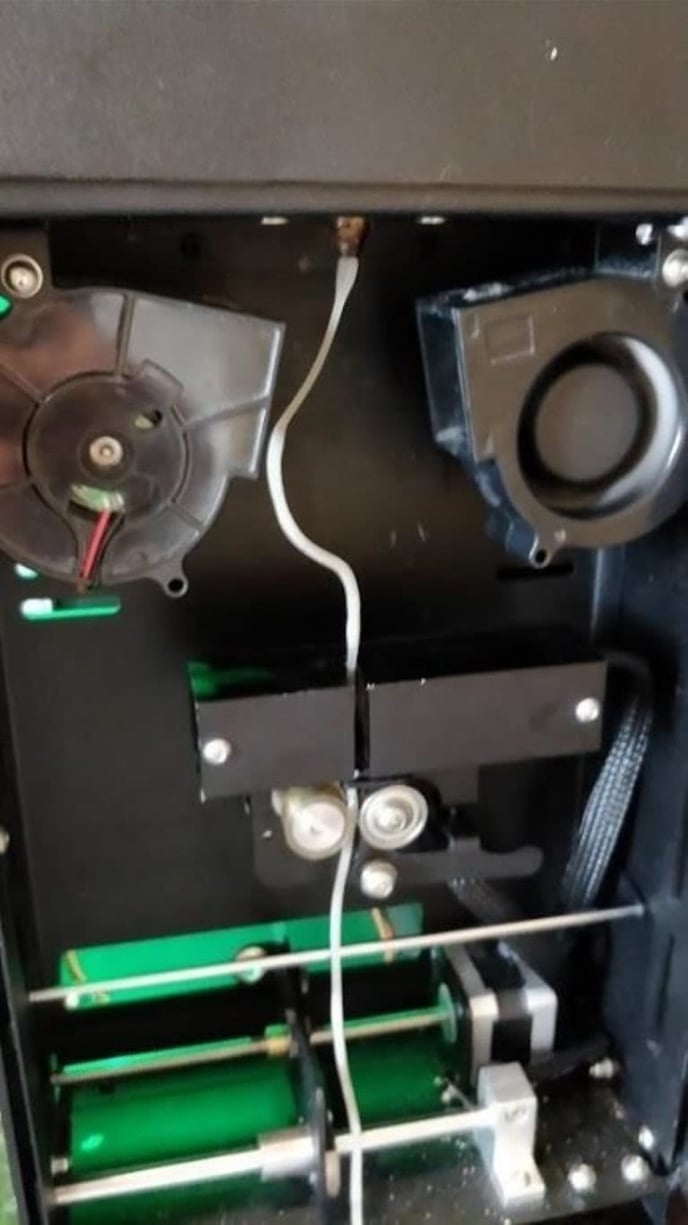
completely clog up the nozzle. To keep the nozzle warm enough for extrusion, the whole nozzle was surrounded with the glass wool as visible in Figure 14. Another problem was the material still being too warm in the barrel. This resulted in bubbles in the filament. To stop this from happening, heater four and three were lowered. Heater one and two were increased a bit to stop the filament from becoming solid around the nozzle. We found that the filament was still swirling.
PET bottles are made using injection molding. Most materials used for injection molding have a very low melt viscosity and have a very narrow transitioning window of being a liquid or a solid. This makes it hard to extrude these materials because in a molten state the material is very liquid and a few degrees lower will give the material a very solid state. This makes it challenging to form filament without it collapsing under its own weight, as seen in the previous tests. In the following test, we will extrude filament on a diameter of 1.75 mm instead of the 2.85 mm. This will hopefully stop the filament from collapsing under its own weight.
 3.2.3. Result #3
A couple of things changed due to the results of the previous test. The heaters were all set at 240 °C, the diameter was changed from 2.85 mm to 1.75 mm and the nozzle was more insulated by the glass wool. The settings used for this test are shown in Table 4 below.
Table 4: Modified extrusion settings (note: fancooling is influenced by room temperature)
| Test 3 (1.75mm) | Heater 4 | Heater 3 | Heater 2 | Heater 1 |
| Heater setpoint | 240°C | 240°C | 240°C | 240°C |
| Screw speed | 5RPM | |||
| Filament fan speed | 80% |
Observations
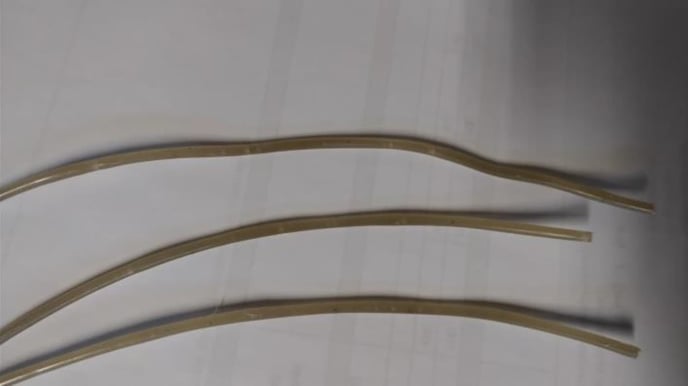
The filament extruded using these settings was a lot better than with the previous tests. All the bubbles were gone, the material stopped clogging in the nozzle and the filament stopped swirling. The average diameter of the filament was well around 1.75 mm. The only small problem was the filament being just a bit too cold around the nozzle. This caused some hard pieces in the filament right before the cooling was done by the fans (shown in Figure 15).
Conclusion
The filament had gotten a lot better with the new settings and the insulated nozzle. The only small problem was the filament having some hard pieces. To make even filament with no hard pieces, the temperature of heater four was increased in the next test.
3.2.4. Result #4
In the last test, good filament was extruded, with the only issue being the forming hard pieces now and then. Therefore, heater one was set on a slightly higher temperature. The final settings used are shown in Table 5 underneath.
Table 5: Modified extrusion settings (note: fancooling is influenced by room temperature)
| Test 4 (1.75mm) | Heater 4 | Heater 3 | Heater 2 | Heater 1 |
| Heater setpoint | 240°C | 245°C | 240°C | 245°C |
| Screw speed | 5RPM | |||
| Filament fan speed | 80% |
Observations
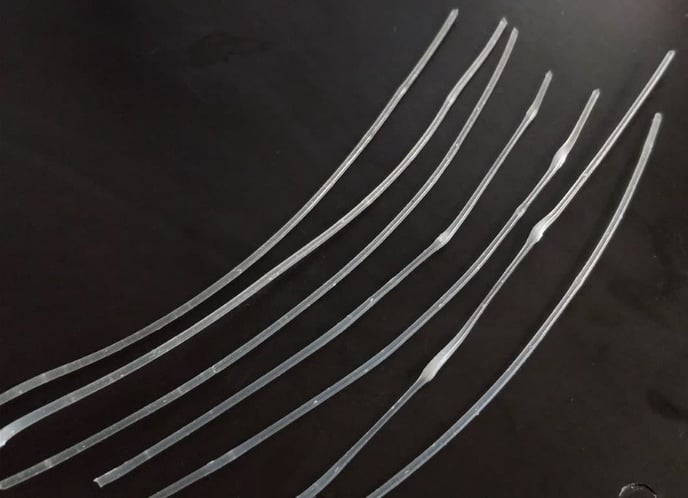
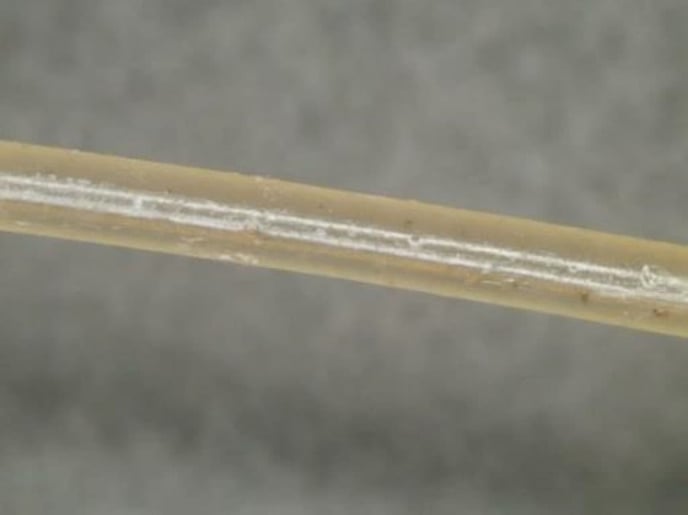
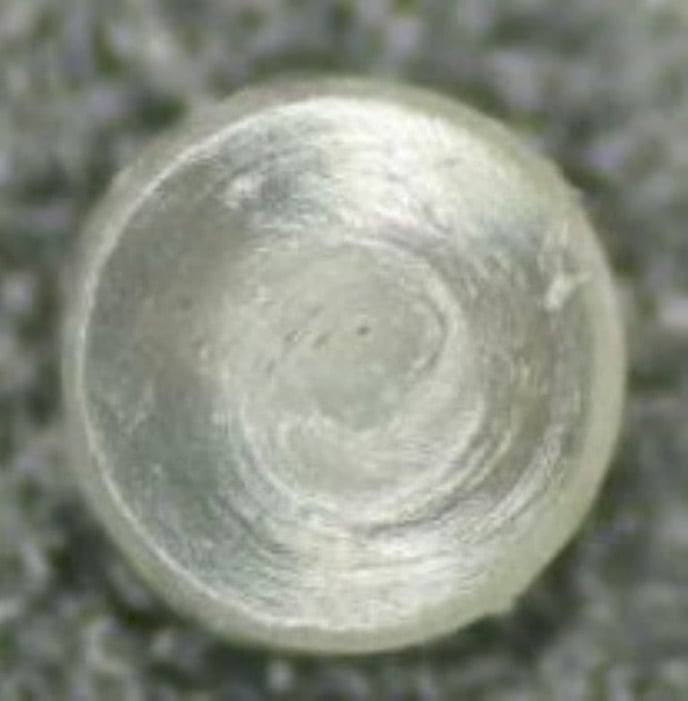
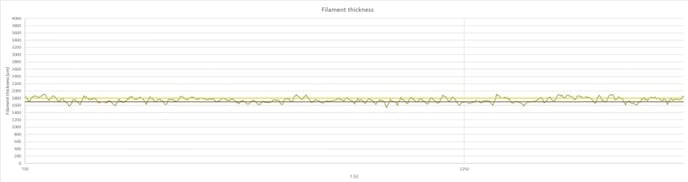
It was found that for a good extrusion, heater one is necessary to be increased by 5°C. When the temperature of heater one got above 245°C, then the filament came out too liquid and started swirling again. The filament received with these settings was good. As shown in Figure 16 and 17, was the filament perfectly round and had a smooth surface. Shown in Graph 1 is the filament thickness of this extrusion. Here it is visible that the diameter of the filament was consistent with these settings.
Conclusion
Important while extruding shredded PET is to keep the nozzle warm. This is done by insulating the nozzle with glass wool (shown in Figure 18). It’s also important to set heater one at least 245°C. When these precautions are not taken, some filament will most likely solidify in the nozzle and completely jam it. Making filament from shredded PET will work best if it’s made with a diameter of 1.75mm. When a thicker diameter is used, the filament will probably collapse under its own weight, causing the filament to swirl and jam in the filament sensor. The filament formed using the settings is shown in figure 19 and 20 underneath. The final settings for a good extrusion of shredded PET are shown in Table 6 underneath.
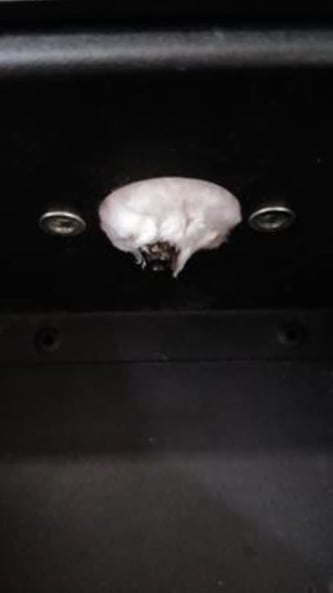
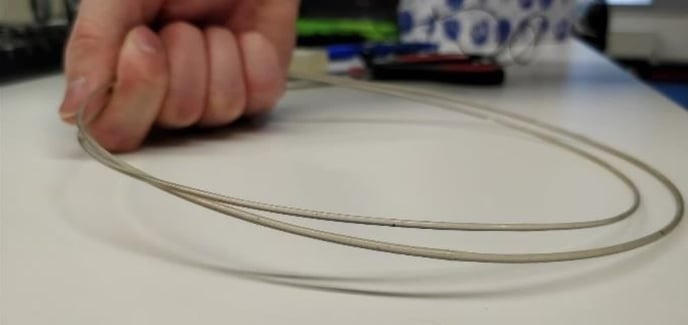
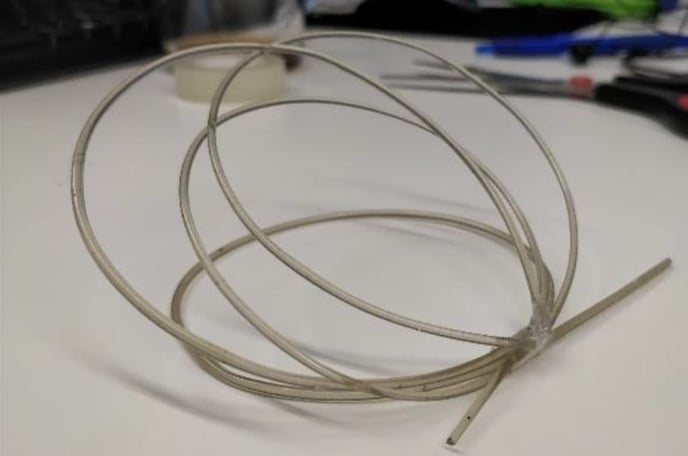
Table 6: "Final" settings (notes: fancooling is influenced by room temperature, and the overall results depend on PET type/grade/brand)
| Final settings (1.75mm) | Heater 4 | Heater 3 | Heater 2 | Heater 1 |
| Heater setpoint | 240°C | 245°C | 240°C | 245°C |
| Screw speed | 5RPM | |||
| Filament fan speed | 80% |
Another report about the same topic
Watch this video