
Our experiences with the recycling of shredded PLA. The goal was to produce 2.85mm filament and assess its quality. The influence of drying the regrind before extruding it was also analyzed.
1. General
This document shows the extrusion process of shredded PLA. It contains an explanation of how we managed to get the right settings for your Filament Maker. We did this for both dried PLA regrind and for non-dried PLA regrind. We cover some important things to keep in mind when extruding PLA regrind in your Filament Maker.
1.1. Relevant material properties
The chemical properties of PLA, are shown in Table 1 below.
| Material name | Polylactic Acid |
| Melting temperature range | 145-160°C |
| Max extrusion temperature | 220°C |
| Crystallinity | semi-crystalline |
1.2. Final extruder settings
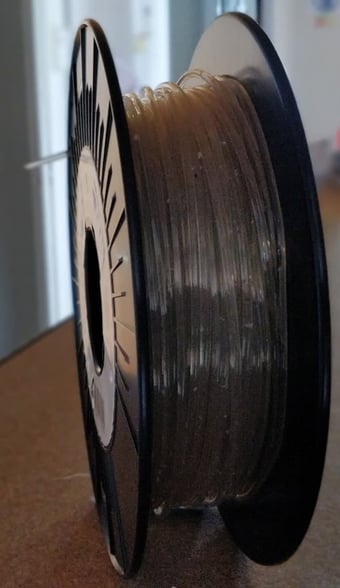
The final settings used for the extrusion of PLA are shown in Table 2 below. These settings work for both dried and non-dried PLA regrind. Underneath, Figure 1a and 1b are the two pictures of the spools made using these settings.
| Final extruder settings | Heater 4 | Heater 3 | Heater 2 | Heater 1 |
| Heater temperatures (°C) | 170 | 185 | 190 | 180 |
| Screw speed | 5RPM | |||
| Filament fan speed | 70% |
Fancooling is influenced by the room temperature

 Figure 1a (left): spool of recycled PLA produced from non-dry regrind
Figure 1b (right): spool of recycled PLA produced from dry regrind
2. Starting up the extruder
While extruding shredded materials, we recommend using the Feeder. When this is not done, accumulation can occur on the sides of the hopper (shown in Figure 2). Accumulation on the sides of the hopper (referred to as "ratholing") can lead to a bad flow resulting in a bad extrusion. In the following part of this document is shown how we managed to get the PLA regrind into printable filament with the Filament Maker. PLA can be left in the machine after extrusion. For the test with extruding PLA, we used the standard PLA settings shown in Table 2.
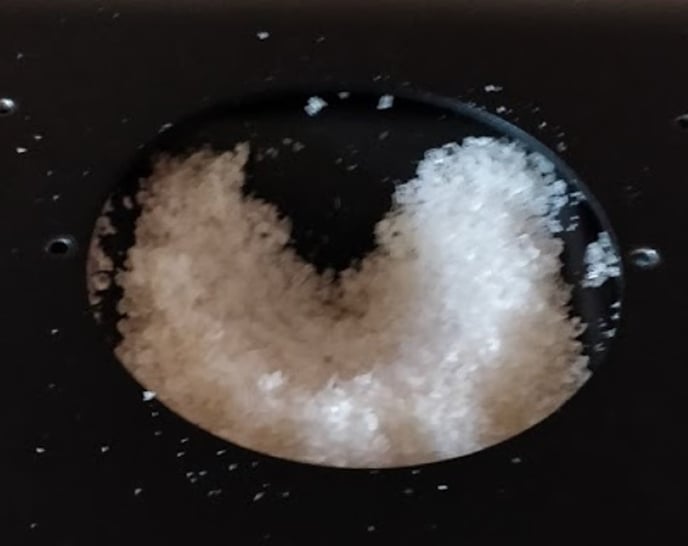 Figure 2: accumulation in the hopper
3. Extrusion trials and results
The Filament Maker was used for the extrusion of shredded PLA. Following are the test results. Here we show the used settings, an observation of some samples of the filament and the conclusion. The tests are done for the extrusion of 2.85 mm filament. The first test is done with non-dried PLA regrind. The second test is done with pre-dried PLA regrind. At the end of both tests, there is a conclusion with the final settings and a graph. These graphs show the thickness of the filament while it being extruded on to the spools.
3.1. Shredded PLA (Non-dried)
3.1.1. Extruder settings
Below are shown the standard PLA settings. These settings are also used for the extrusion of the shredded PLA.
| Test 1 | Heater 4 | Heater 3 | Heater 2 | Heater 1 |
| Heater temperatures (°C) | 180 | 190 | 185 | 180 |
| Screw speed | 5RPM | |||
| Fan speed | 70% |
3.1.2. Results & observations
We began testing with shredded PLA, we started off with the standard PLA settings. We found that these settings worked really good. After a while, we slowly increased the temperatures and after that decreased the temperatures. We found that lower temperatures and higher temperatures had a bad effect on the extrusion of shredded PLA. We also tried increasing and decreasing the extruder speed and the fan speed, but this also resulted in a less good filament. The filament received using these settings was very good. The shape of the filament came out really round, as visible in the section view in Figure 3. The surface was smooth without any bubbles or lines, as shown in the surface view in Figure 4. The consistency of the filament thickness is shown in Graph 1 below. The thickness was well around 2.85 mm.
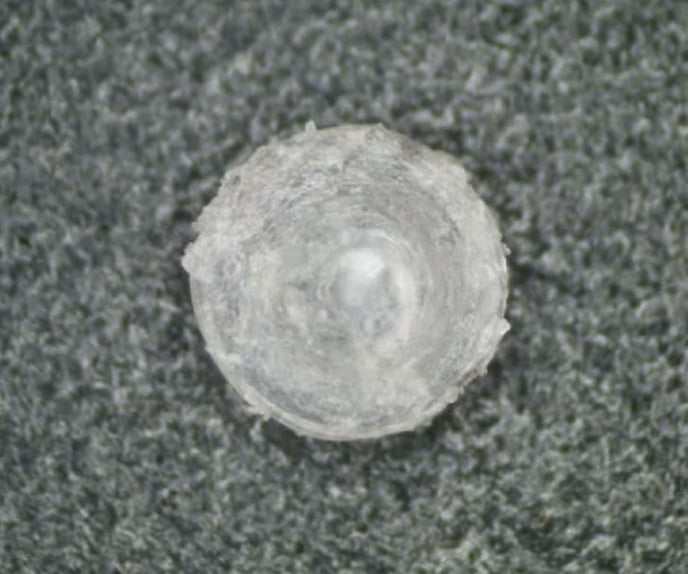 Figure 3a: Cross-section of non-dried PLA filament
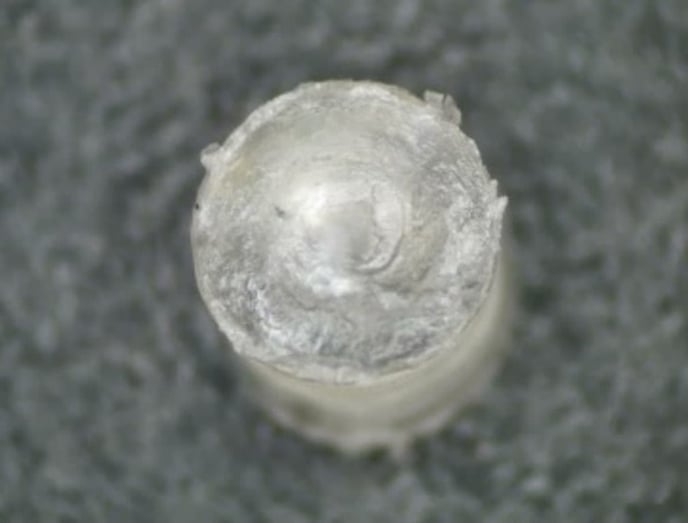 Figure 3b: Cross-section of non-dried PLA filament
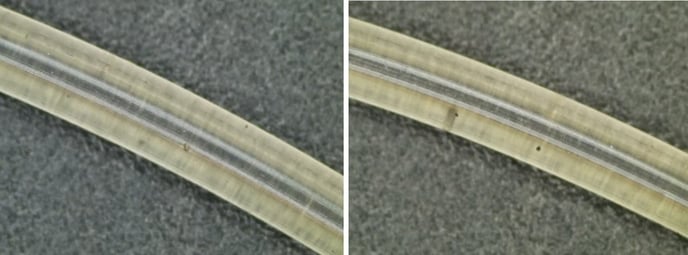 Figure 4: Surface view of non-dried PLA filament
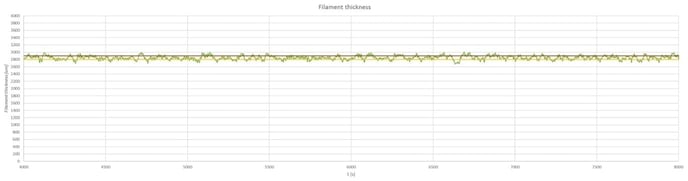 Graph 1: Filament thickness (vs time) of non-dried PLA filament
3.1.3. Conclusion
We found that the standard PLA settings worked the best for shredded PLA. The final spool made using these settings is shown in Figure 5 :
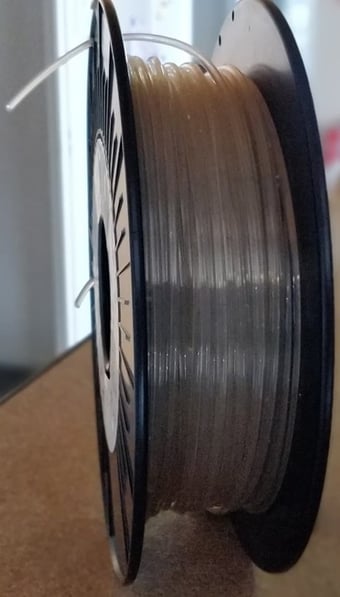 Figure 5: Spool of non-dried PLA filament
3.2. Shredded PLA (Dried prior to extrusion)
3.2.1. Extruder settings
Below are shown the standard PLA settings. These settings are also used for the extrusion of the shredded PLA.
| Test 1 | Heater 4 | Heater 3 | Heater 2 | Heater 1 |
| Heater temperatures (°C) | 180 | 190 | 185 | 180 |
| Screw speed | 5RPM | |||
| Fan speed | 70% |
3.2.2. Results & observations
The results of this test were very good. Again, the shape and the surface of the filament were perfect as shown in Figure 6 and Figure 7. The consistency of the filament thickness got even slightly better than with the non-dried PLA regrind. This is clearly visible in Graph 2.
 Figure 6a: Cross-section of pre-dried PLA filament
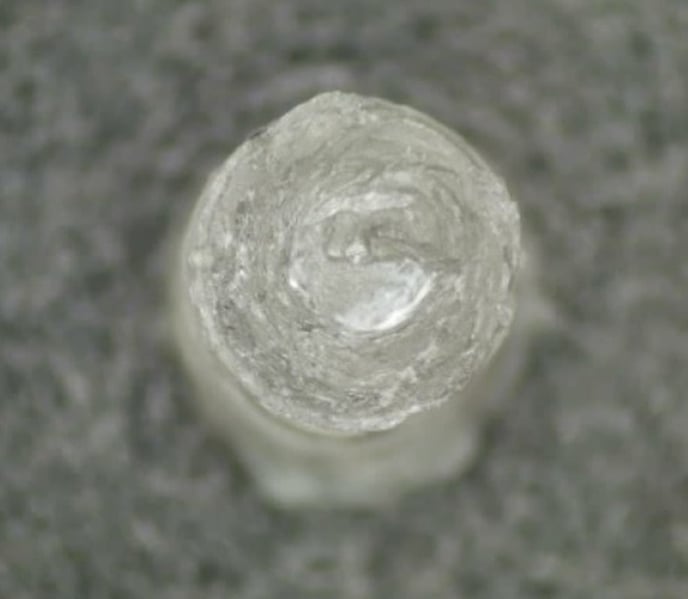 Figure 6b: Cross-section of pre-dried PLA filament
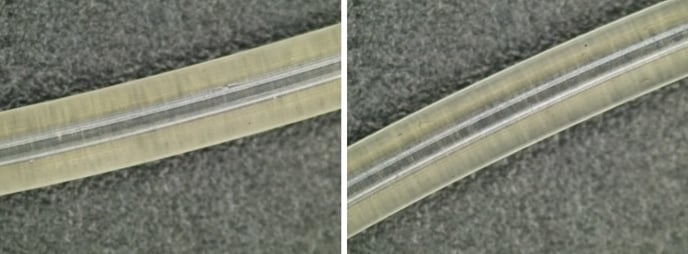 Figure 7: Surface view of pre-dried PLA filament
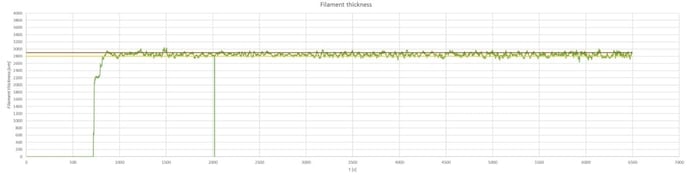 Graph 2: Filament thickness (vs time) of pre-dried PLA filament
3.2.3. Conclusion
For extrusion with shredded PLA, we recommend drying the regrind before the extrusion. This will give the filament an more consistent diameter. This is visible when Graph 1 is compared to Graph 2. The spool received extruding the dried PLA regrind is shown in Figure 8 below.
4. Conclusion
As shown in the test results above, both dried and non-dried PLA regrind extrude well with the standard PLA settings. Something to keep in mind while extruding shredded materials is to stir the regrind in the hopper in order to stop the accumulations from happening in the hopper.