
![]() Caution
Caution
For all adjustments and maintenance activities to the machine, make sure to turn the machine off and remove the power cable.
![]() Caution
Caution
Before reinstalling the shredder blades, it is very important to make sure that the shredder shafts, all shredder blades and shredder spacers are cleaned properly. If dust or contaminant get stuck between the blades, the right clearance cannot be ensured which may result in extreme damage to the shredder blades and scraper combs.
![]() Warning
Warning
Always wear cut resistant gloves when working around and inside the cutting chamber.
When the shredder shafts, shredder blades and shredder spacers are properly cleaned, the blades can be reinstalled.
- Start by sliding a shredder blade on the left shaft. Make sure the teeth are pointing in the clockwise direction.
- Slide one shredder spacer on the right shaft opposing the shredder blade.
 |
- Slide another shredder blade on the right shaft. Make sure the teeth are pointing in the counterclockwise direction.
- Slide a shredder spacer on the left shaft opposing the shredder blade.
 |
Note
| In case of the 7 teeth-blade: In order to keep track of the rotational configuration of the stacked blades, it is advised to use the small cut-out located on the outer contour of the shredder blade for your reference. |  |
The recommended configuration for 7 teeth blades is to stack each subsequent blade one-sixth turn with respect to the previous blade of the same shaft. In case of a 3-teeth-blade: use steps of 30 degrees (1/12th of a turn). These sequential turns can be done either clockwise or counterclockwise as long as it is done consistently for both shafts.
 |
- Repeat step 1 until 4 until all blades are placed.
- The hexagon shaped part of the shaft should be completely covered with shredder blades and spacers. In the illustration below, the blade and spacer have an 1,3mm overlap. The overlap may vary as long as there is some overlap.
 |
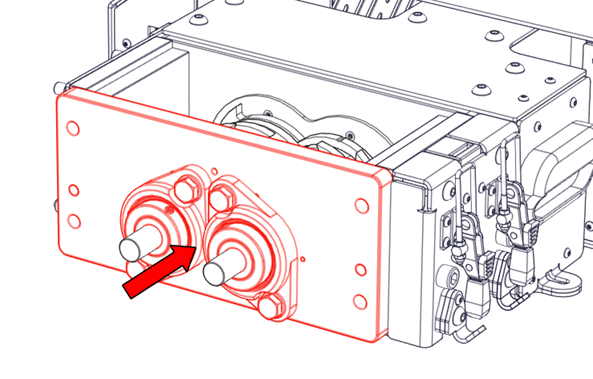
- Slide the front plate back on the shafts. Make sure the front plate is cleaned properly around the cylindrical bushings.
 |
- Start by placing one thin nut per shaft and tighten the nuts a little bit at a time. Even tightening is important to avoid imbalances in the stacked blades.
- If both thin nuts are tightened and there is no play in the shredder blades, the nylon locking nuts can be placed and tightened against the thin nuts. This ensures a proper holding force for the stacked blades.
 |
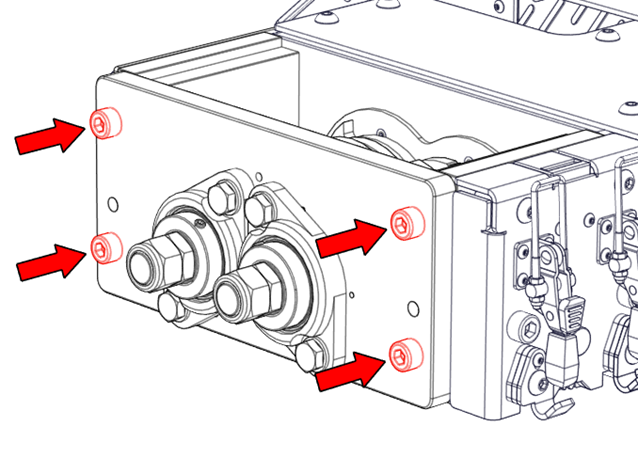
- Screw in the four bolts in the corners of the front plate using a 8mm Allen key.
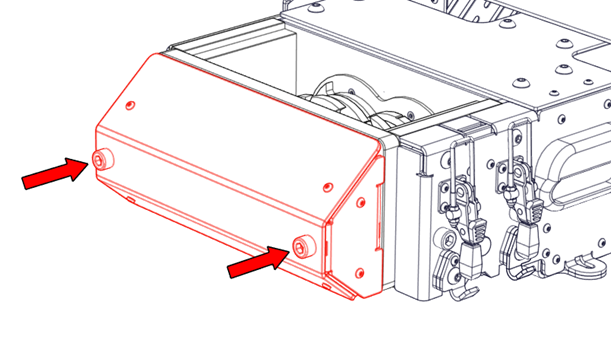
- Mount the black casing plate back on the machine by screwing in the two bolts also using a 8mm Allen key.
 |
 |