
Tools required
- Cut resistant gloves
- 8mm Allen key
- Loctite 243
![]() Warning
Warning
Always wear cut-resistant gloves when working around and inside the cutting chamber.
Instructions
- Open the granulator door, remove the container and remove the filter screen as instructed in this article.
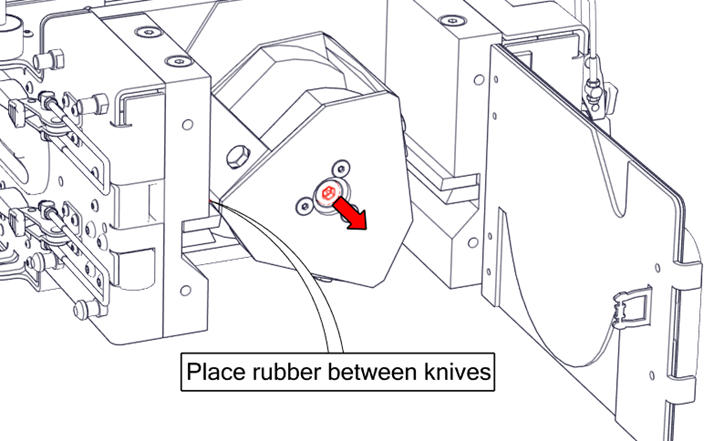
- Block the rotor by placing a piece of rubber between the rotary and stationary knives. Use an 8mm Allen key to unscrew the bolt that locks the rotor in place.
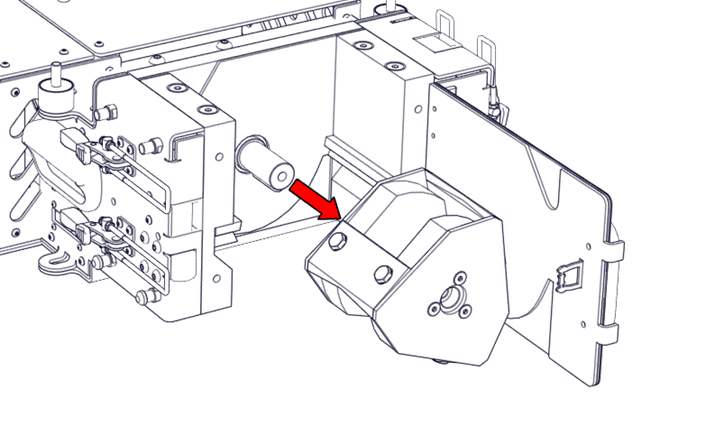
- Carefully slide the rotor out of the cutting chamber.
Note
Ensure you have the Loctite 243 available before removing the rotor from its place. The Loctite has to be re-applied to ensure they remain in place during operation.
 |
 |
- When installing the rotor, it is important to properly clean the cutting chamber first to ensure proper alignment of the rotor.
- Locate the keyway inside of the hole of the rotor and locate the key inside of the shaft
 |
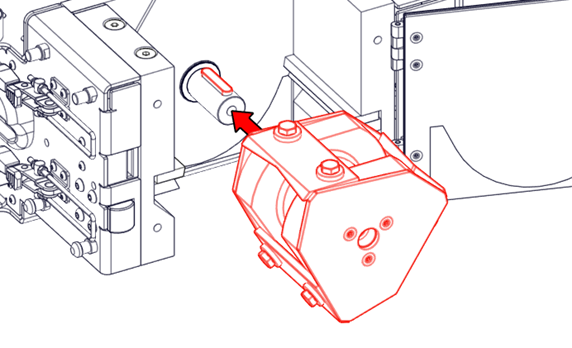 |
- Slide the rotor fully on the drive shaft
- Apply a fair amount of Loctite 243 to the end of the bolt that goes into the center of the rotor.
![]() Caution
Caution
Ensure to not forget to apply the Loctite 243 to the center bolt before reinserting it into the machine. Skipping this step may lead to excessive machine damage.
- After applying the Loctite 243, insert the bolt through the hole in the center of the rotor and tighten it.
- Manually turn the rotor to verify that the rotor runs smoothly.
![]() Caution
Caution
Loctite 243 requires a few hours to dry, so during the first 24 hours, you can run the machine empty for a few minutes to ensure it operates perfectly. Avoid operating the machine with materials during this time.