
1. General: the study about recycling PEEK
This document shows a detailed explanation of the extrusion process for shredded PEEK. It gives a overview of how we managed to get the right extrusion settings. We also provide information about the cleaning process and we discuss some important things to keep in mind when extruding PEEK with 3devo's filament maker. Please note that this document is only an indication on the extrusion process for PEEK, different machines and polymer grades may require different settings. The Victrex 450G material data sheet recommends a drying period of 3 hours, just to be sure that we removed all the excess moisture we dried the material for 7 hours. The residual moisture content should be < 0.02%. Table 1 shows some important material properties relevant for extrusion:
2. Cleaning the extruder
It is important to note that PEEK cannot stay in the extruder after extrusion since this will cause impurities that will impact the quality of subsequent production. It is important that the hopper sensor is turned off and also it is very important to have the extrusion screw rotate continuous. Before extrusion the machine was cleaned using Devoclean Mid-Temperature, a universal cleaning material. Make sure the hopper sensor is switched off. Extrude with Devoclean Mid-Temperature until you can no longer see any material in the hopper opening. Only when you no longer see Devoclean Mid-Temperature in the hopper opening, do you add Devoclean High-Temperature, which contains glass fiber specifically for cleaning at high temperatures. Always ensure that the extrusion system continues to run and increase the temperature. Make sure that you keep extruding 5 to 10 minutes longer so you can be sure that Devoclean Mid-Temperature is completely removed. The Devoclean High-Temperature was used to heat the filament maker up to the desired temperature before adding the PEEK to the hopper. If you no longer see Devoclean High-Temperature in the hopper opening, PEEK is added. Also during this step it is important that the extrusion screw continues to run and is at the required temperature. When you have finished extruding PEEK, it is important that PEEK is never allowed to cool down in the extrusion system. This means that the steps with Devoclean High-Temperature and Mid-Temperature must be carried out again. Devoclean High-Temperature must also never stay in the extrusion system. Devoclean Mid-Temperature can stay in the extruder after extrusion has finished. Although HDPE can be used to remove all of the Devoclean Mid-Temperature which will make for a faster start-up the next time the extruder is used.
3. The material
Figure 1 shows the shredded PEEK we used for these tests. We had approximately 200 grams of material to work with, this means we had to change settings quickly to make the most of the amount of product we could work with.
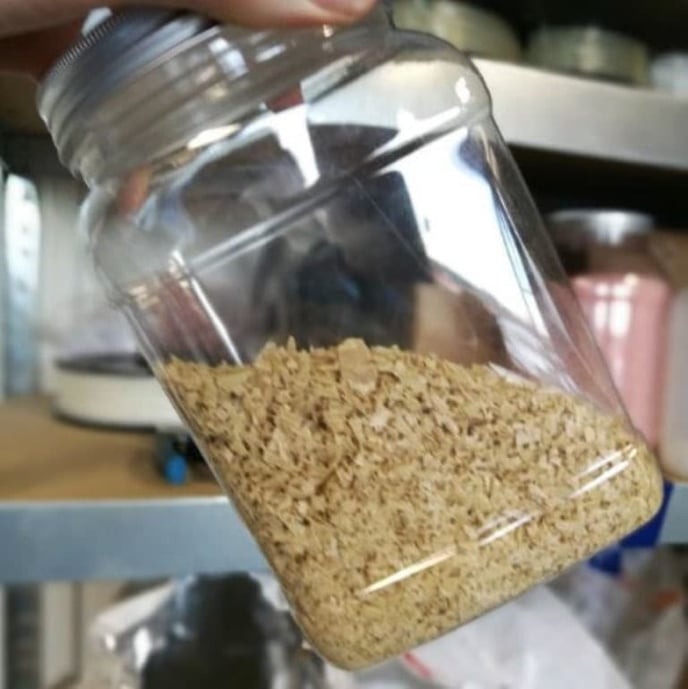 Figure 1: Shredded PEEK flakes
4. Starting up
The Victrex PEEK 450G material data sheet gave some information on typical processing conditions for extrusion, so we decided to use these temperatures as a starting point for our extrusion process and change the settings according to the obtained results. Since we got up to the starting temperature using Devoclean High-Temperature, which has a low Melt Flow Index (MFI). MFI is inversely related to the melt viscosity which makes it quite difficult to start extruding with the shredded PEEK, the low bulk density causes the material to bridge at the throat feed of the hopper. Whenever working with flakes, it is recommended to set up the Feeder (vibration device).
5. Extrusion results
5.1. Result #1
After seven hours of drying the material at 150 °C the extrusion process was started, the used settings are shown in Table 1 beneath. We decided to use an extruder RPM of 3.5 as a starting point since we tried to extrude the material at 1.75 mm.
| Test 1 | Heater 4 | Heater 3 | Heater 2 | Heater 1 |
| Heater temperature (°C) | 360 | 365 | 370 | 375 |
| Screw speed | 3.5RPM | |||
| Fan cooling | 0% |
When starting the extrusion process for a new material there are three important things to look out for, these are:
- How does the filament look? Are there any signs of bubbles/holes, die lines, weld lines, melt fracture or warpage?
- Is the flow similar to that of standard PLA (when using the same RPM)?
- Is it possible to pull the material without problems? I.e. does the material stick to the puller wheel or does it break as a result of the force of the puller?
In this case we noticed that the material started to build up at the nozzle. This means that the temperature of the nozzle is too low, so increasing heater 1 should fix this issue. When we look at the log, specifically the puller speed, we can see that the flow starts to decrease from the moment we start pulling the material. We could fix this by increasing the temperature of the heaters and by increasing the extruder RPM.
Figure 3 and 4, below, display the puller speed and the filament thickness respectively.
 Figure 3: Puller speed (vs time) during test 1 (the higher on the graph, the lower in reality)
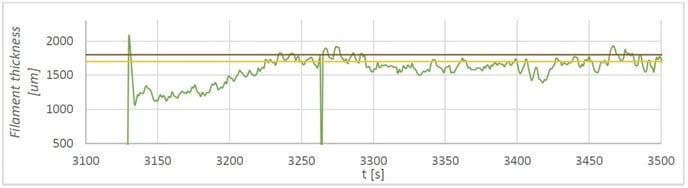 Figure 4: Filament thickness (vs time) during test 1
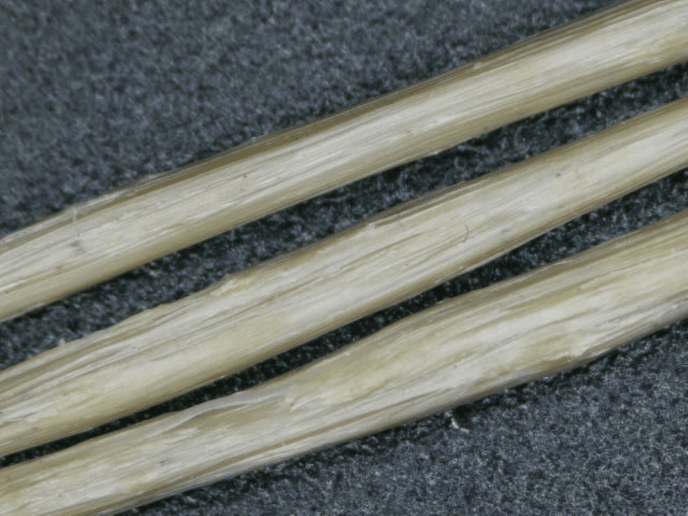 Figure 5: Filament produced during test 1
The filament for test number 1 has quite rough edges, this also confirms that the temperature at the nozzle is too low. After test number 1 we stopped pressure feeding.
5.2. Result #2
For test number 2 we increased the temperatures of heater 1 and 4 as well as increasing the RPM to gain a better flow rate. Due to the increase in temperature we had to increase the fan speed as well to keep the material from sticking to the puller. The used settings are shown in Table 2 below.
| Test 2 | Heater 4 | Heater 3 | Heater 2 | Heater 1 |
| Heater temperature (°C) | 370 | 365 | 370 | 385 |
| Screw speed | 5RPM | |||
| Fan cooling | 10% |
At first these settings seemed to work really well, the filament thickness was within the range of 1.75 mm ± 50 μm tolerance for 400 seconds but suddenly the filament thickness started to deviate more and the flow got worse as well. It also seems that over time the temperature of the material exiting the nozzle is still a bit too cold to be completely stable, increasing the temperature of heater 1 should fix this problem while decreasing the temperature of heater 4 will lead to more back pressure inside the barrel which will subsequently increase the flow.
Figure 6 and 7 show the flow and filament thickness for test number 2.
 Figure 6: Puller speed (vs time) during test 2 (the higher on the graph, the lower in reality)
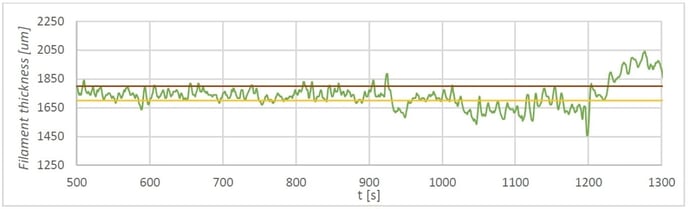 Figure 7: Filament thickness (vs time) during test 2
We did notice an increase in the filament quality in terms of physical characteristics, the surface roughness from test number 1 almost completely disappeared as can be seen in figure 8 beneath.
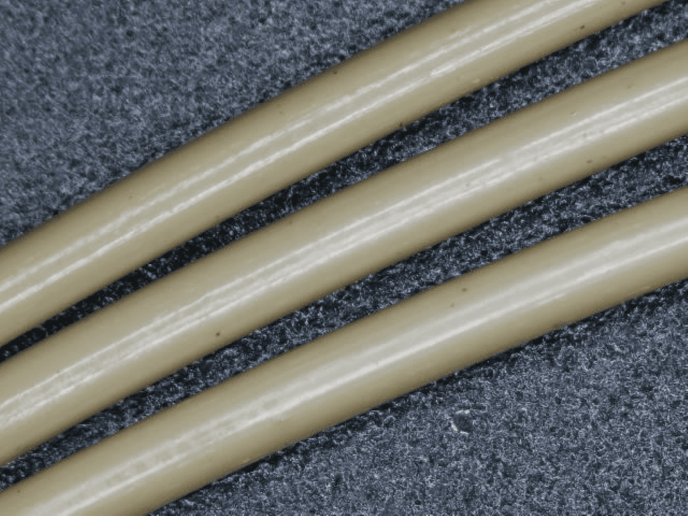 Figure 8: Filament produced during test 2
5.3. Result #3
For test number 3 we decided to set the temperature for heater 1 to 395 °C and the temperature of heater 4 to approximately the melting point of the PEEK at 345 °C. We used heaters 3 and 2 respectively to build up the temperature from heater 4 to heater 1. The used settings can be seen in Table 3.
| Test 3 | Heater 4 | Heater 3 | Heater 2 | Heater 1 |
| Heater temperature (°C) | 345 | 360 | 375 | 395 |
| Screw speed | 5RPM | |||
| Fan cooling | 10% |
With the settings above we managed to get quite a good flow and a good filament thickness for the most part within the range of 1.75 mm ± 50 μm. Because we did not have a lot of material left we decided to use these as are final settings and try to put the filament on a spool.
Figure 9 and 10 show the puller speed and the filament thickness of the PEEK for the final test.
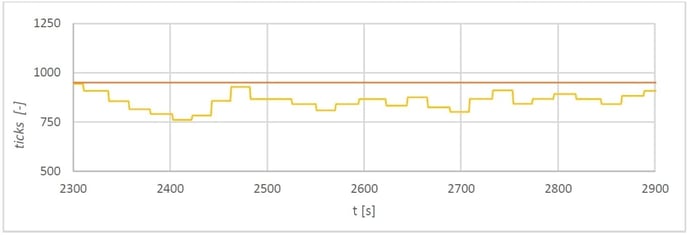 Figure 9: Puller speed (vs time) during test 3 (the higher on the graph, the lower in reality)
As can be seen the puller speed for test number 3 is quite good, it stays almost completely above the set puller max of 950, which tells us that the flow is good.
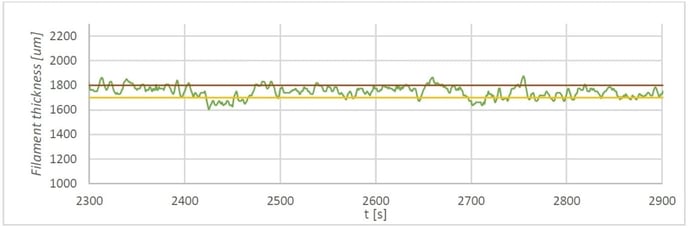 Figure 10: Filament thickness (vs time) during test 3
The graph above shows the filament thickness for test number 3, for the most part the thickness stays between the set range of 1.75 mm ± 50 μm.
Figure 11 shows a close-up of the created filament whereas Figure 12 displays the spool created with the settings for test number 3.
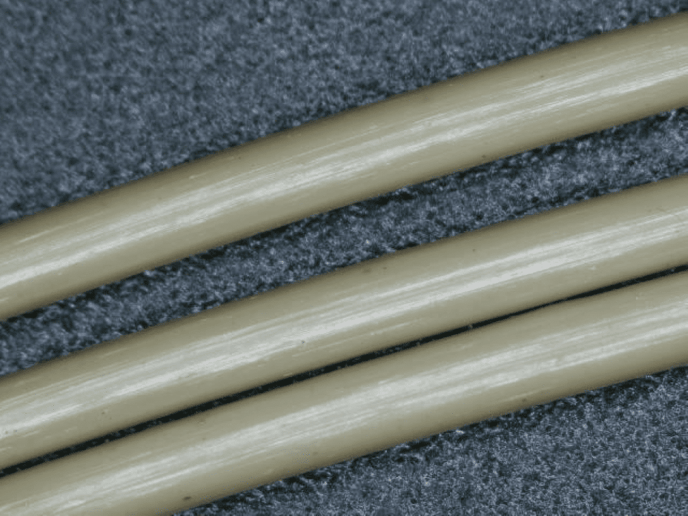 Figure 11: Filament produced during test 3
The figure above shows filament that looks good, the surface has a smooth texture and the filament is round with a solid diameter.
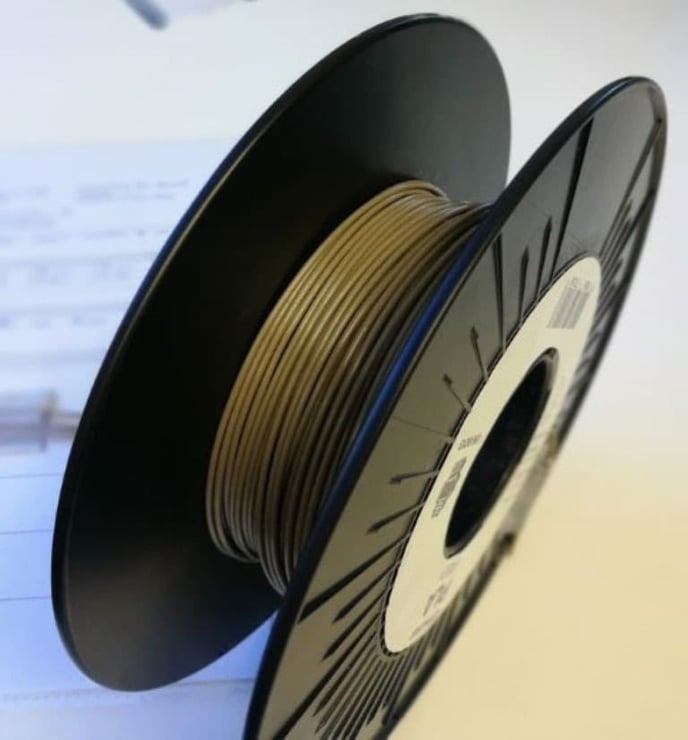 Figure 12: Filament spooled during test 3 (easy to spool because the product was quite flexible)
5.4. Possible issues with PEEK
It is important to note that PEEK is not compatible to stay in the extruder after shutting it down, this will cause the material to oxidize inside the barrel contaminating subsequent extrusion. Furthermore it is key that when bringing the extruder up to temperature for PEEK a material is used that does not degrade at this temperature. We suggest using Devoclean Mid-Temperature and Devoclean High-Temperature to get to the desired temperatures.
6. Conclusion
It is definitely possible to extruded shredded PEEK using the 3devo filament maker, although some further fine-tuning has to be done to obtain the best results possible. Since the PEEK decomposition temperature is approximately 575 °C experiments at higher temperatures can be done. Keep in mind that at lower processing temperatures less polymer degrades which causes the material to have the best possible properties.
We advise to process PEEK in the following range of temperatures:
| Heater 4 | Heater 3 | Heater 2 | Heater 1 | |
| Tmin (°C) | 350 | 360 | 370 | 390 |
| Tmax (°C) | 375 | 380 | 390 | 400 |