
Download the full guide in PDF format, or read through the article below.
Overview |
|
|
|
|
The nozzle is the part located at the end of the extrusion system that determines the shape of the filament. There are several reasons for changing the nozzle:
|
|
Tools required
Parts required
|
|
|
|||


Note
The Filament Maker low output troubleshooting article could help identify reasons the nozzle was clogged or dirty in the first place. Ensure to find the cause of the issue when replacing the nozzle, to ensure it does not repeat itself.
Step 1: Purge the machine with Devoclean MidTemp
It is highly recommended to perform these operations when the machine is purged and filled with Devoclean MidTemp material. If the nozzle is clogged and unable to be purged with Devoclean MidTemp, removing the nozzle might be more difficult due to higher melting temperatures.
Step 2: Remove the top hood
To remove the top hood follow these instructions.
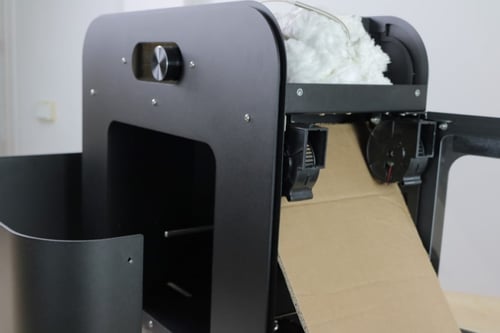
Step 3: Access the nozzle
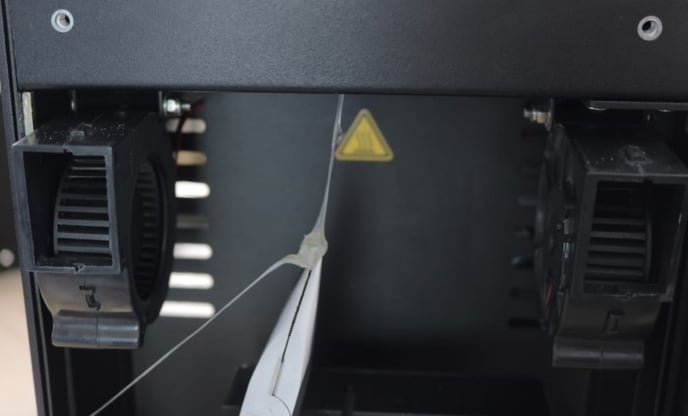
Cover the filament sensor with a sheet of paper or cardboard, and turn the filament fans to point forward.
 |
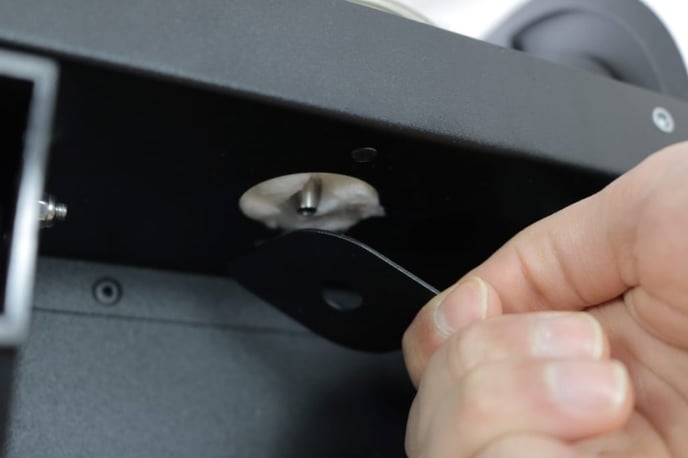
Step 4: Remove nozzle plate
Carefully remove the nozzle plate with the Hex key OR pull it carefully off if it is attached with magnets. This will depend on your machine model.
 |
 |
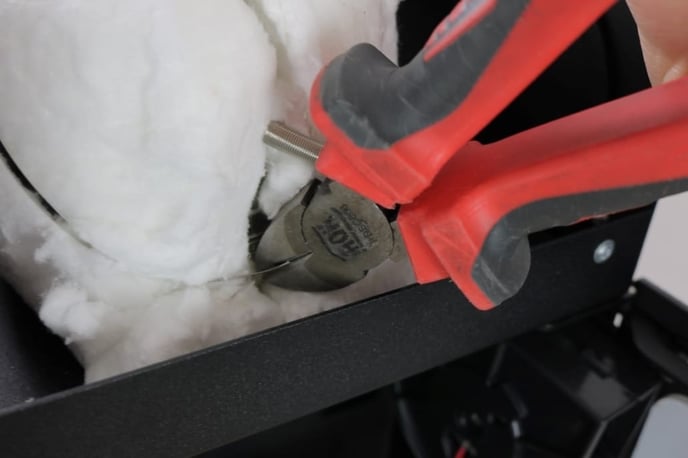
Step 5: Open insulation wool
![]() Caution
Caution
To prevent skin contact with the insulation wool, ensure to wear cuts- and abrasiveness- resistant gloves.
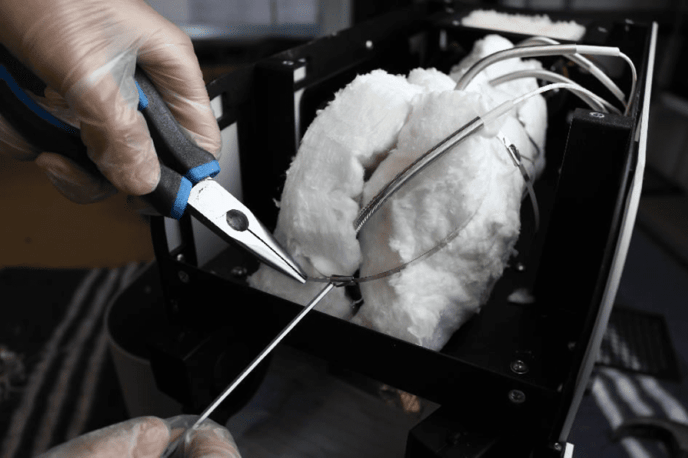
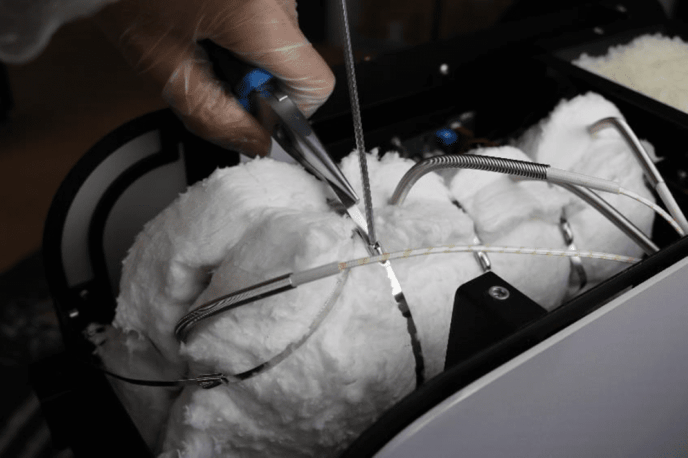
The front metal tie wrap keeps the insulation wool secured around the nozzle.
- Try to move the metal tie wrap forward and open the insulation wool towards the sides to temporarily have access to the nozzle.
- If the previous step fails, cut the tie wrap with a cutter, you will have to replace it after the procedure.
 |
 |
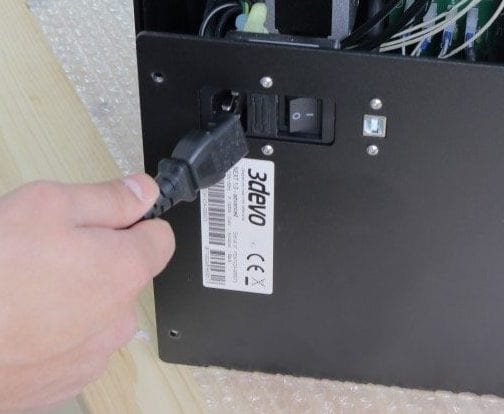
Step 6: Setting the temperature
Plug in the power cable and turn on the machine.
![]() Caution
Caution
After connecting the power cable and turning on the machine, ensure to stay away from any electrical components inside the machine.
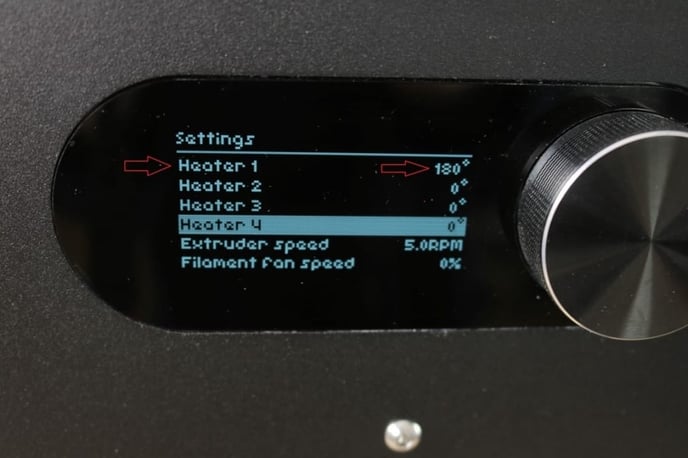
Go to "Settings" and set the temperature of "Heater 1" (indicated with the red arrows) above to 200°C for Devoclean MidTemp. When using another material, use the melting point of the material that is currently in the extrusion system. Scroll down and hit 'Apply' to return to the main screen.
 |
 |
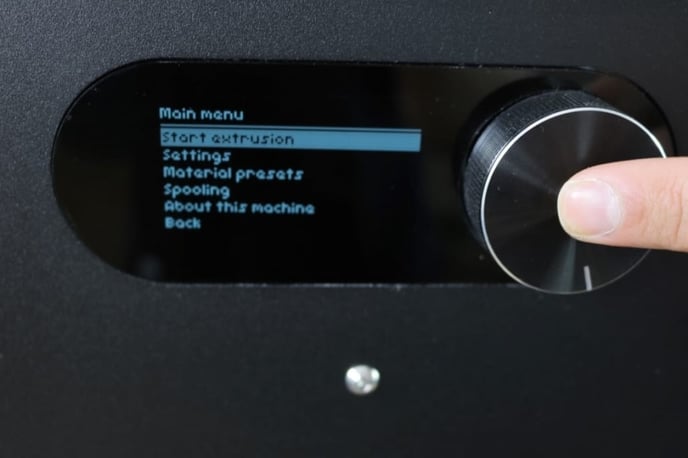
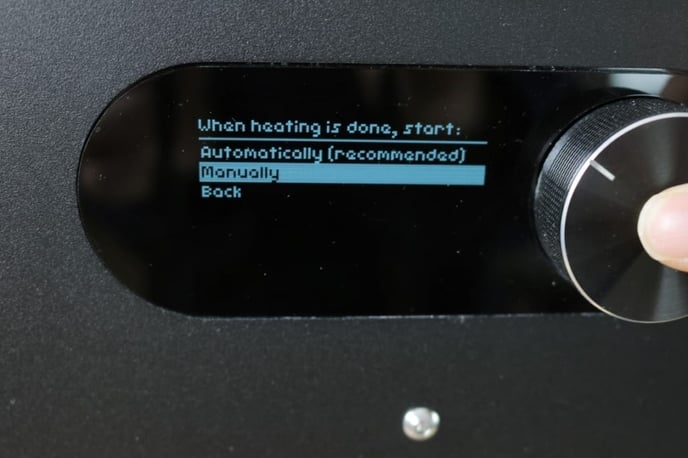
Press "Start extrusion" and select "Manually" (this ensures the screw will not start after reaching the target temperature).
 |
 |
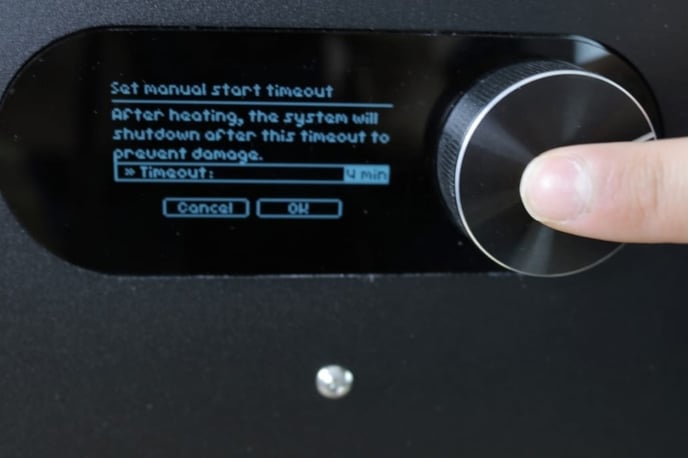
Set the timeout to 4 minutes, and click 'OK', the system starts heating. After the timeout, the heaters will turn off and the system will cool down slowly, you will have plenty of time to replace the nozzle.
Note
During heating of H1, the other temperatures also increase slightly. This is normal, as heat transfers through the barrel. Heating the nozzle may take up to 15 minutes. After heat up, the LED light turns blue and the machine will beep every minute, you may ignore these.
 |
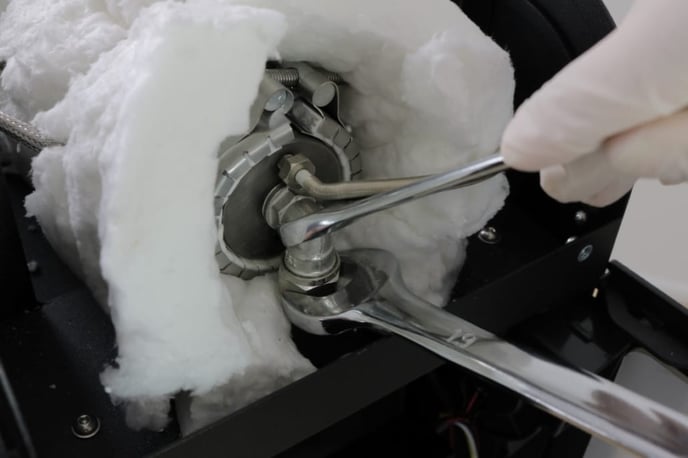
Step 7: Remove the nut
When heater 1 is at the desired temperature, the nut can be removed. Use wrench 13 to support the elbow fitting and use wrench 19 to loosen the nut.
![]() Caution
Caution
Ensure to wear heat resistant gloves, the fitting is hot!
The nozzle fitting is installed facing downward, the turning direction as in the photo is CLOCKWISE, and might feel counter-intuitive. Ensure to turn the proper way.
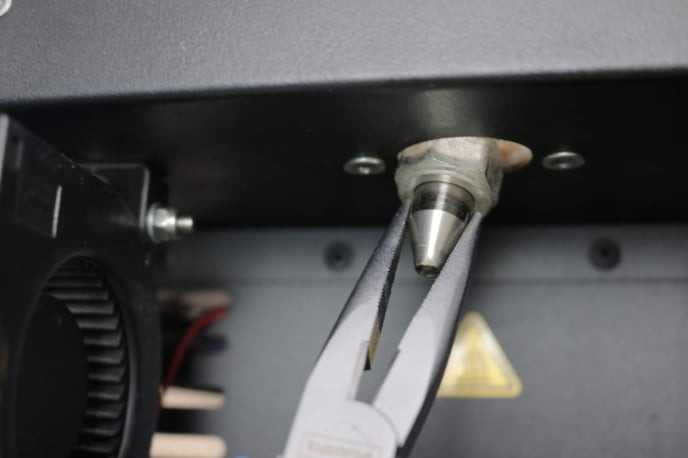
If the nut is loose, carefully grip the nozzle with the pointed nose pliers and pull it down. Sometimes rotating the nozzle inside the knee, or pulling it towards different directions can help get it loose.
 |
 |
Nozzle stuck
In some cases, the nozzle might be stuck after removing the nut, due to molten residue or wear and tear. Restart at 'Step 4', with an increased H1 temperature by 20°C, in an attempt to melt any material inside the nozzle. If this does not succeed, please contact us!
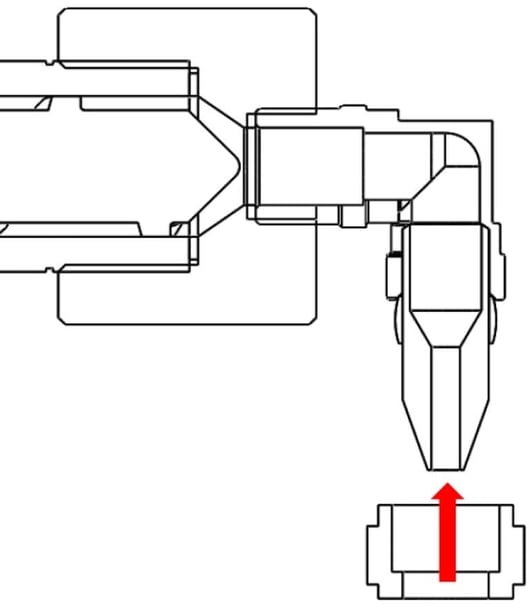
Step 8: Clean the elbow fitting
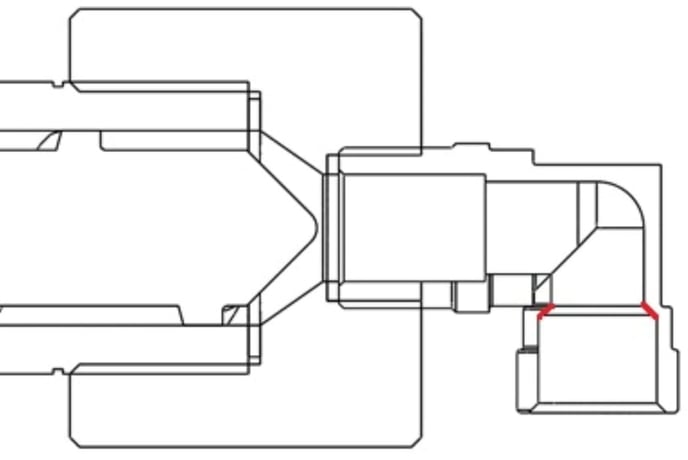
Make sure the inside of the elbow fitting is as clean as possible. Try to remove all the plastic. You can do this carefully with, for example, tweezers. It is of the utmost importance to have the edge (indicated with red in the diagram below) thoroughly cleaned.
After removing the nozzle, the standby timer stops heating the machine. You may turn off the machine and continue the next step.
 |
 |
Note
Remove all excess plastic from the nut (if you keep using the old nut). This step is often difficult but sometimes the nut will be detached almost fully clean. It is recommended to use a new nut every time the nozzle is changed.
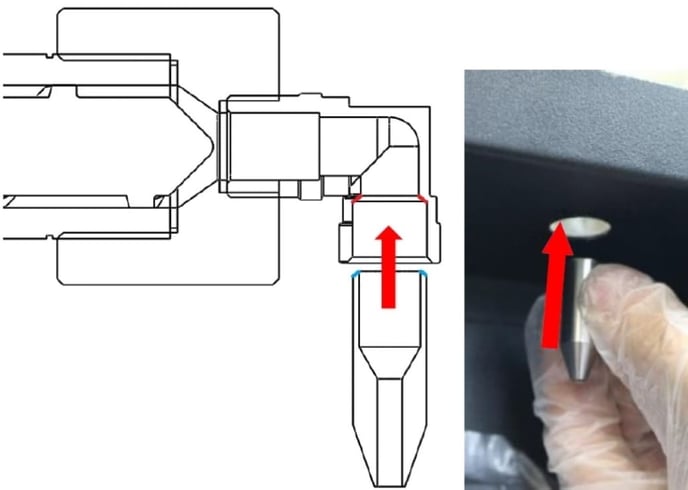
Step 9: Mount the new nozzle
When the elbow fitting is clean, you can push the nozzle inside the elbow fitting. The nozzle should be pressed as far as possible into the elbow fitting, so that the colored edges (indicated by the color red and blue) touch each other. If it is too hard to push the new nozzle in, this might mean that the inside of the knee is not clean enough.
 |
 |
Now that the nozzle is in the right place, the nut that holds these parts must be attached. Tighten the nut on elbow fitting as tight as possible without causing damage. Beware! It is possible that the nozzle has dropped down. It is extremely important that the nozzle is pressed tightly against the elbow fitting before the nut is tightened tightly. It is recommended to push up the nozzle and the nut with one hand (equipped with a heat-resistant glove), while starting tp tighten the nut with the other hand.
 |
 |
Step 10: Place insulation wool back
Fold insulation wool back around the extruder and use new tie wraps to hold the isolation wool on its place. If you had not cut the tie wraps in the first place, just make sure you close the insulation wool back around the head of the barrel and make sure the tie wrap is still tight.
 |
 |
Step 11: Re-attach nozzle plate
Reverse of step 2. Attach the nozzle plate with the Hex key OR with magnets, depending on your machine model.
Step 12: Mount top hood
Follow these steps in reverse order to mount the top hood back on the machine.