
Note
The GP20 Shredder Hybrid comes delivered fully assembled. This guide can be used for disassembly and re-assembly instructions when required.
Table of contents
Trolley installation instructions
GP20 Shredder installation instructions
GP20 Granulator installation instructions
GP20 Hybrid installation instructions
![]() Warning
Warning
Wrong use of the machine or manipulating safety switches may lead to severe injuries or failure of the machine. The manufacturer is not liable for any problems caused by the user’s failure to observe these instructions.
Trolley installation instructions
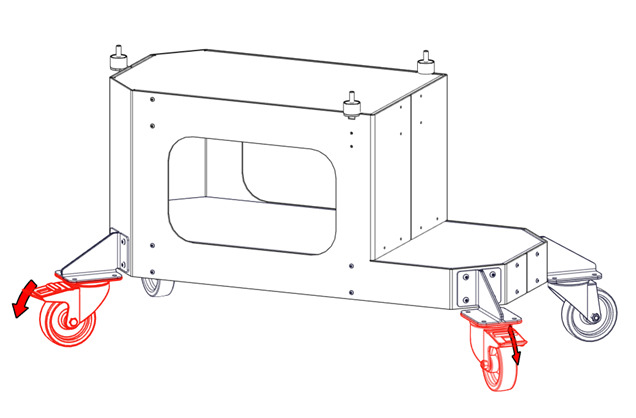
Mount the Wheel assemblies to the Trolley using 4x button head screws M6 x 20, 4x washers and 4x lock nuts per Wheel assembly. The two Wheel assemblies with brakes should be positioned along the longest side of the Trolley. Do not tighten the bolts all the way yet.
 |
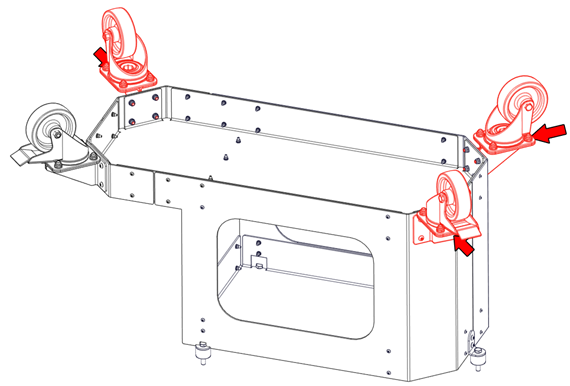 |
If all the Wheel assemblies are in place, tighten the bolts fully
GP20 Shredder installation instructions
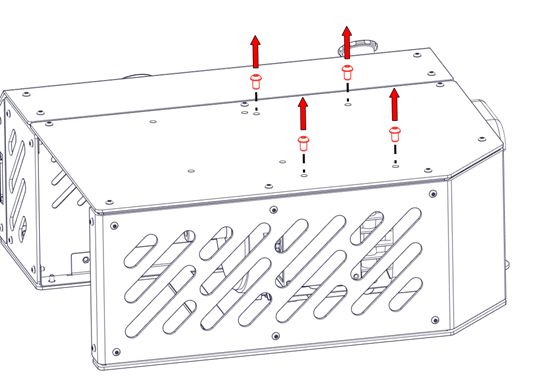
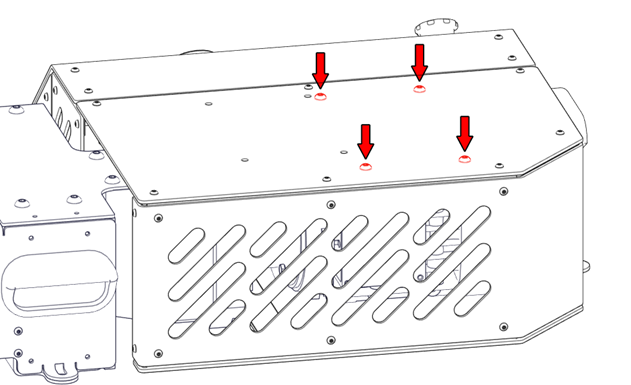
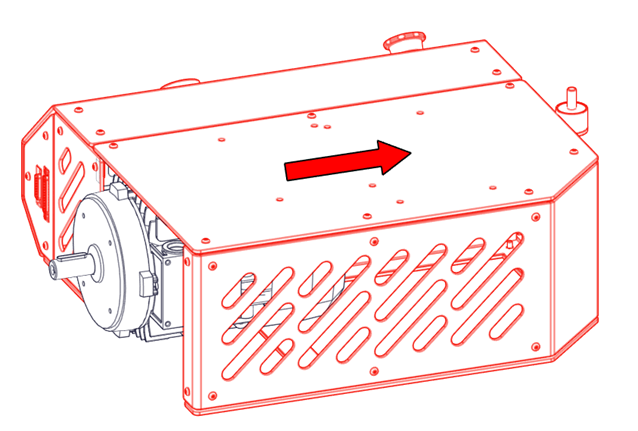
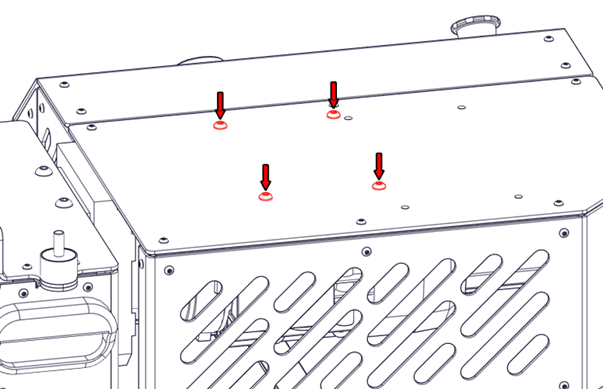
- Remove the four bolts on top of the Control box / Shredder assembly.
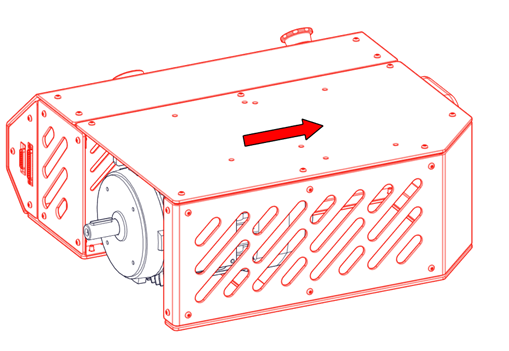
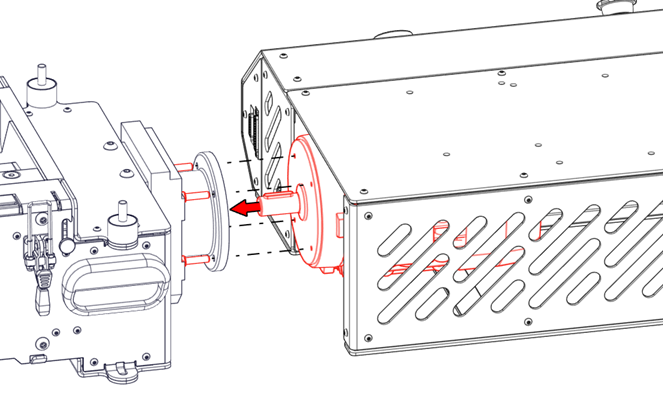
- Slide the Control box / Shredder away from the motor to create space around the motor flange.
 |
 |
- Mount the motor on the Shredder compartment and secure the two items with 4x hexagon head screws M6 x 20 (10mm wrench).
 |
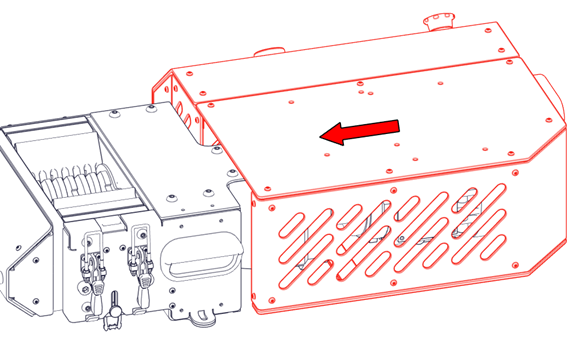
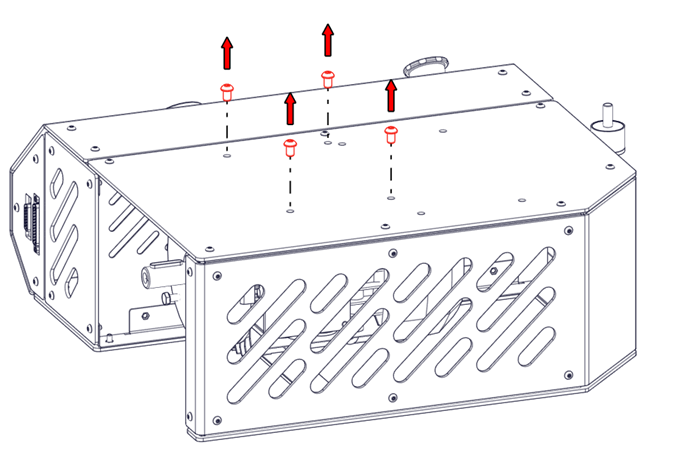
- Slide the Control box / Shredder back on and attach the Control box / Shredder to the motor using 4x button head screws M6x20 (4mm Allen key).
 |
 |
- Insert the Scraper combs in the Shredder compartment and tighten the 4 bolts on the sides using an 8mm Allen key. This will secure the Scraper combs in place.
- Place the Trolley on a flat and stable place on the floor close to a power socket. Make sure the fuses are rated on at least 15A.
|
 |
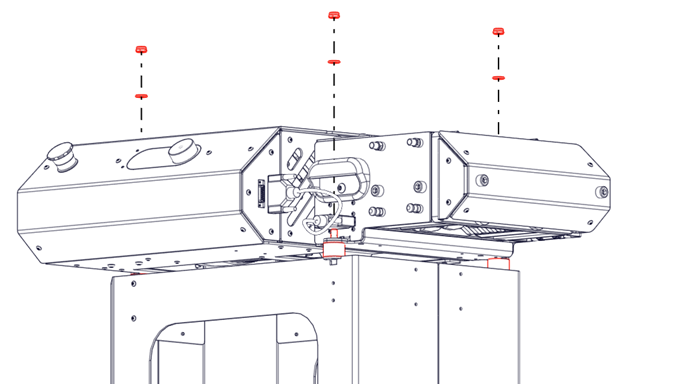
- Locate the three mounting holes on the bottom of the GP20 Shredder. The holes should be positioned on the three threaded positioning studs on top of the Trolley.
- Carefully lift the GP20 Shredder with two persons on top of the threaded positioning studs of the Trolley.
- Secure the GP20 Shredder in place by placing M8 washers and nuts on the threaded positioning studs.
 |
 |
GP20 Granulator installation instructions
- Remove the four bolts on top of the Control box / Granulator.
- Slide the Control box / Granulator away from the motor to create space around the motor flange.
 |
 |
- Mount the motor on the Granulator compartment and secure the two items with 4x hexagon head screws M6 x 20 (10mm wrench).
 |
- Slide the Control box / Granulator back on and attach the Control box / Granulator to the motor using 4x button head screws M6 x 20 (4mm Allen key.
 |
 |
- Place the Trolley on a flat and stable place on the floor close to a power socket. Make sure the fuses are rated on at least 15A
|
 |
- Locate the three mounting holes on the bottom of the GP20 Granulator. The holes should be positioned on the three threaded positioning studs on top of the Trolley.
- Carefully lift the GP20 Granulator with two persons on top of the threaded positioning studs of the Trolley.
- Secure the GP20 Granulator in place by placing M8 washers and nuts on the threaded positioning studs.
 |
 |
GP20 Hybrid installation instructions
- Place the Trolley on a flat and stable place on the floor close to a power socket. Make sure the fuses are rated on at least 15A.
|
|
- Locate the three mounting holes on the bottom of the GP20 Granulator. The holes should be positioned on the three threaded positioning studs on top of the Trolley.
- Carefully lift the GP20 Granulator with two persons on top of the threaded positioning studs of the Trolley.
- Secure the GP20 Granulator in place by placing M8 washers and nuts on the threaded positioning studs.
 |
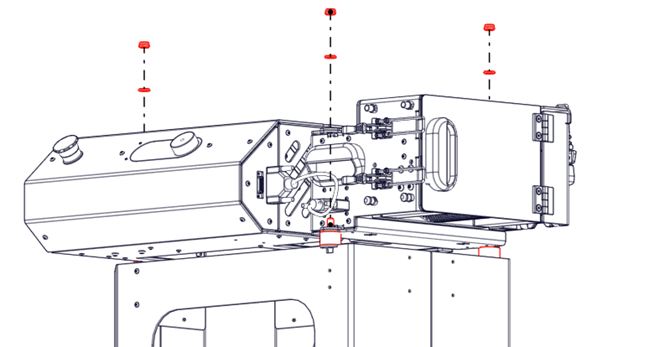 |
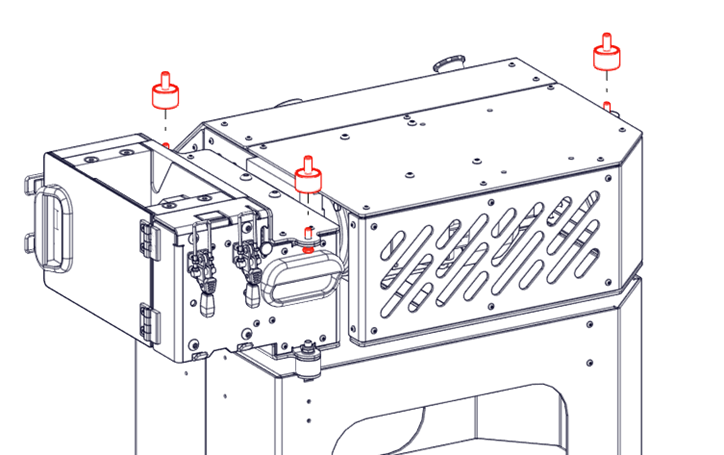
- Prior to placing the GP20 Shredder, mount three positioning studs on the GP20 Granulator using three M8 x 14 hexagon bolts and three washers.
- Locate the three mounting holes on the bottom of the GP20 Shredder. The holes will be positioned on the three threaded positioning studs on top of the GP20 Granulator.
- Carefully lift the GP20 Shredder with two persons on top of the threaded positioning studs of the GP20 Granulator.
 |
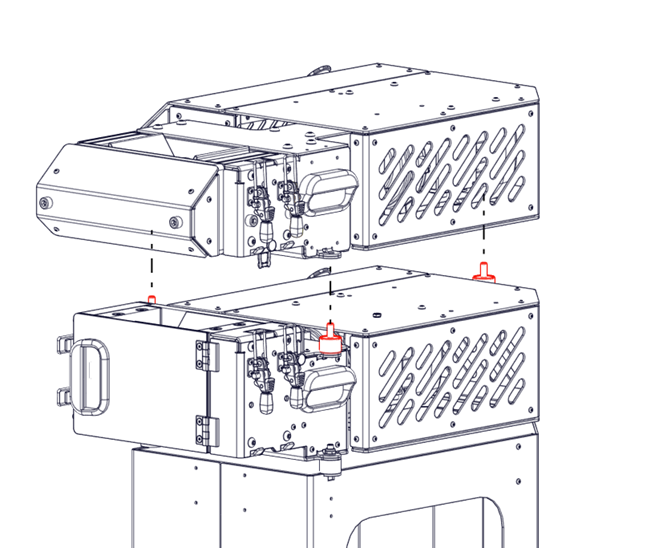 |
- Secure the GP20 Shredder in place by placing M8 washers and nuts on the threaded positioning studs.
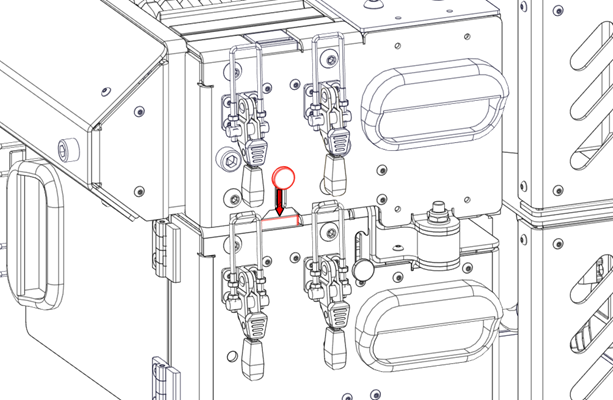
For Hybrid mode, the safety switches must be configured correctly.
 |
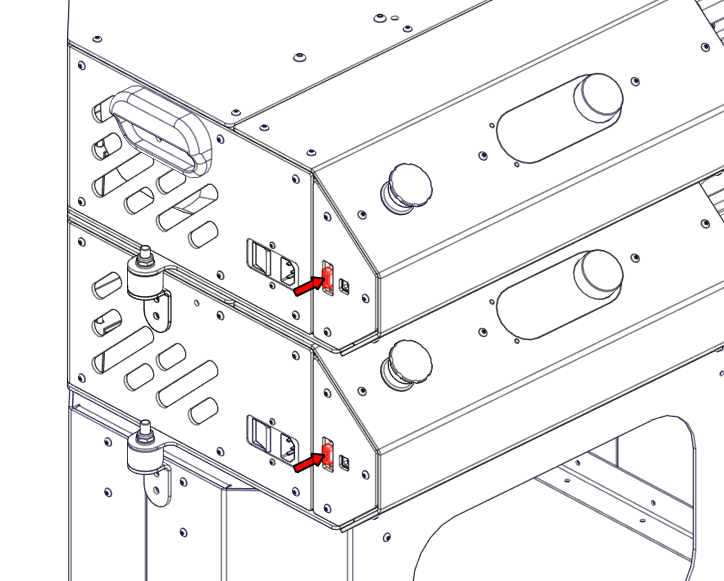
- Loosen the thumbscrew as shown below. Slide the safety actuator from the GP20 Shredder down until it clicks. Tighten the thumb screw.
- Loosen the thumb screw of the Granulator like shown below. Slide the safety actuator from the GP20 Granulator up until it clicks. Tighten this thumb screw as well.
 |
 |
- Use the “Machine link cable” to connect both machines.
 |
Continue reading
Next step is to mount the container of the GP20 Shredder Hybrid.
Alternatively, continue reading how to operate the machine.