
Table of contents
Caution!
The machine barrel is and should never be left empty.
We actually ship the machine to you with PLA inside the barrel, as the Filament Maker should always have either extruding material or purging material inside it.
If you try and "empty" the machine, there will always be leftover residue, which will burn, degrade or even damage the Filament Maker. which brings us to...
What is purging?
If you are unfamiliar with the process and its importance, please start by reading our dedicated article: What is Purging?
When to purge the Filament Maker?
Every single time after use!
Purging material can be left in the machine. Polymers cannot be left in the machine. Even if you plan on processing the same material several times in a row. The one exception is when processing virgin PLA (from 3devo). In our own experience there are only three materials which do not need purging:
- virgin PLA (3devo)
- HDPE
- DevoClean MidTemp
Please note, these materials should be raw materials without any additives.
Warning!
DevoClean High-Temperature must not remain in the machine.
It must be purged with DevoClean Mid-Temperature at 300°C after use.
What are the machine settings?
There are no purging presets.
Temperature
You should always use the same temperatures you were using to process the material you are about to purge (because it, too, must melt). Those temperatures must also be included in the thermal range of the purging material. See Purging Materials below.
Screw speed
5 - 15 RPM
Naturally, it depends on what material you are about to purge out of the machine.
5 RPM is the base line. Some basic materials like PLA have "Machine Presets" at 5 RPM.
10 RPM can help speed things up, if the purge has a good flow.
15 RPM is used for regular high speed purging, but observe the material flow carefully, and
avoid dangerous pile ups.
If you encounter a stubborn material that is difficult to clean, you can also try Disco Purging. This method creates turbulence in the flow of the purge by randomly changing the speed of the screw every minute.
Find out more about Disco Purge.
Duration
It depends.
You must keep purging until you get a pure output of purging material, free of any other material or impurity. Under normal circumstances, this usually takes about 15-25 minutes, but it can take a lot more time:
- when two purging materials are involved (DevoClean HighTemp and DevoClean MidTemp)
- if the material is very persistent (contains colorants and/or additives)
- if the screw is partially stuck, the flow is weak, and you are trying to get a good flow back
Amount of purging material
It depends.
150-200g is the minimal amount required, but some processes involving multiple transitions or persistent substances can consume more than 400g. The objective is to ensure that none of the previous material has been left inside the barrel. You will need to keep feeding the hopper until this condition is met.
What purging material can I use?
A purging material is defined by:
- Its capacity to remove impurities from the barrel. Abrasive additives can help.
- Its thermal range. This window of temperatures must match the process temperature of the material you wish to purge out.
Purging Materials
A variety of purging materials exists on the market. At 3devo we use the three following options as we know them very well and their combined thermal range covers almost all existing plastics.
| Name | Purging Capacity | Thermal Range (°C) |
Can I leave it safely inside the barrel after shutdown? |
When to use it? |
| 3devo HDPE | medium | 180-280 | Yes |
|
| DevoClean MidTemp | high | 200-300 | Yes |
|
| DevoClean HighTemp | very high | 290-400 | No |
It must be purged with DevoClean MidTemp at 300°C after use. |
Types
Different types of filament materials call for different ways of purging. The way of purging the extruder is based on the melt temperature, viscosity, and the use of additives such as colorants, fibres and fillers. Also the state of the machine plays a part, for example if the extruder is filled with burnt material, heavier purging might be necessary.
The ways of purging can be divided into the following:
- Standard Purge
This is carried out with DevoClean MidTemp (middle temperature) and can generally be applied to all situations if the polymer material has a range of 180-320°C. - Heavy Purge
A heavy purge is done with DevoClean HighTemp (high temperature) at a range of 290-400°C.
Warning!
DevoClean HighTemp must not remain in the machine.
It must be purged with DevoClean MidTemp at 295°C after use.
These levels have their own step by step guides. Please refer to them when purging your Filament Maker.
Preparations
Before purging your extruder, there are a few preparation steps that should be taken for safety.
- Gathering
The first step is gathering all the necessary tools, materials and information for the purging process. These are:- at least 350 grams of purging material, however this will depend on:
- which level of purging you are using
- the type of material that needs to be purged out of the machine
- and the machine’s state
- a piece of paper or cardboard
- tape
- multitool (or a side cutter and pincers)
- at least 350 grams of purging material, however this will depend on:
- Ventilation
Make sure that the area is properly ventilated. A fume hood is also highly recommended to guarantee your safety, especially with Heavy purges. Wearing a gas mask is also a good option. - Sensors
Turn off the hopper sensor in the "Settings" menu, so the hopper can be run completely empty before putting in the purging material. Do this by setting "off" under "Hopper empty check". - Fans
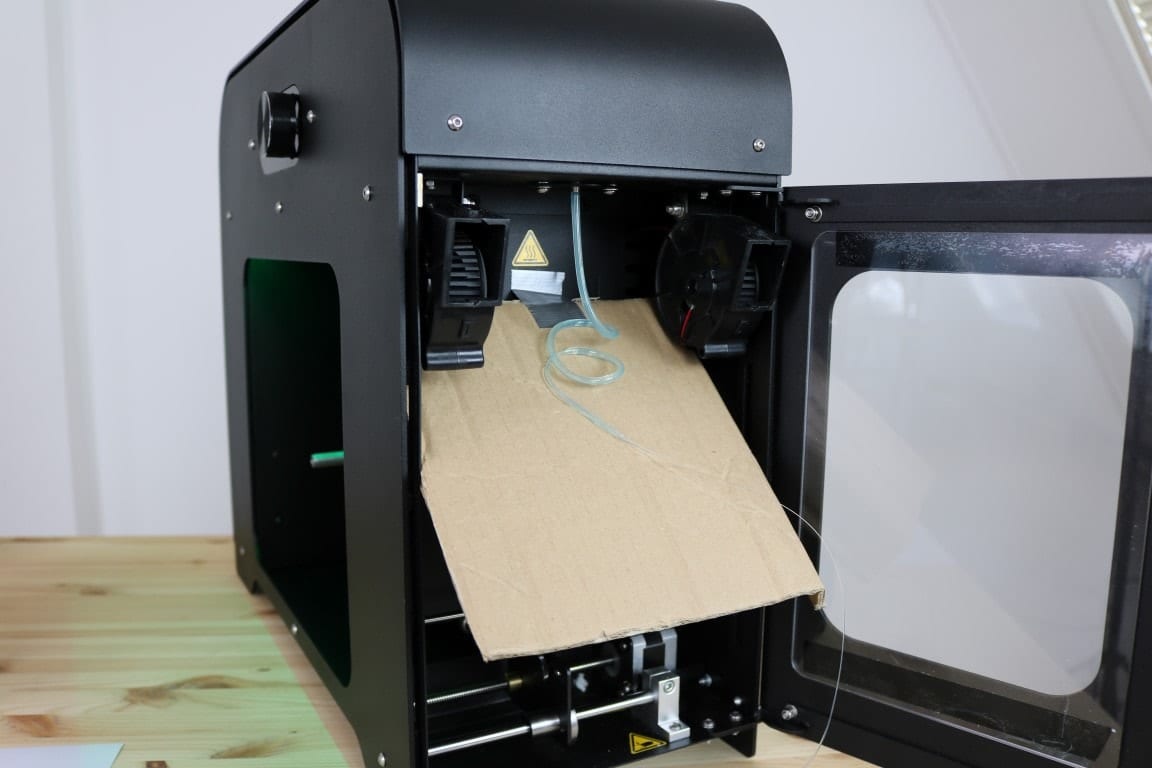
Turn off the filament fans by setting the "Filament fan speed" to 0% in the "Settings" menu, and point them as in the picture below. - Cardboard
Cover the filament sensor with the piece of paper or cardboard and hold it in place with a piece of tape.
 Setup of the filament maker for a purging run
Note:
Do not shut down the machine before the purging process is completed.
Once again, the type of purging you will carry out depends on a lot of factors, including materials, temperatures, and additives. Please follow the guides for each type of purge below: